
Brilliant Guide to Preserving Pumpkin Seeds for Planting

Harvesting, drying, and storing pumpkin seeds correctly is not just a fun fall activity, it’s also a rewarding gardening task that can be quite enjoyable. Not only do you get to carve out a pumpkin, but by preserving its seeds, you effectively lay the foundation for next year’s pumpkin patch. It’s a process that requires careful attention to detail, ensuring that the seeds remain viable for planting. In this detailed guide, you will acquire knowledge about the prime time to harvest pumpkin seeds, how to efficiently clean them, and the proper method for drying seeds to avoid damage or mold development. Additionally, you will learn the most effective ways to store seeds to maintain their germination potential for the next planting season.
Harvesting and Cleaning Pumpkin Seeds
Pumpkin Perfection: Guide to Harvest & Preserve Pumpkin Seeds
Delving into the intriguing world of pumpkin growing is an incredibly rewarding hobby that combines the beauty of nature, the thrill of gardening, and the taste of homegrown produce. But, as any seasoned gardener will tell you, half the fun lies in setting aside those beautiful, nutritious pumpkin seeds for future generations of bountiful harvests. Here, we’ll dive into the how and when of harvesting and cleaning pumpkin seeds, ready for preserving.
Let’s start with the ‘WHEN’. Timing is a crucial factor to ensure we get viable, healthy seeds for preserving. It’s best to wait until your pumpkin is fully mature before attempting to harvest the seeds. In the case of pumpkins, one must be a little patient. A full-grown pumpkin will have a hard shell and consistent, deep color, typically orange. An easy rule of thumb to determine ripeness is to wait until after the first frost or when the vines start drying.
Now that you’ve found the perfect, ripe pumpkin, let’s move to the exciting HOW part.
- CUT THE PUMPKIN: Begin by carefully cutting open the pumpkin. A robust, sharp knife is needed to slice open the top around the stem. Remove the top, and delight in the treasure trove of seeds waiting inside.
- SCOOP THE SEEDS: Grab a sturdy, large spoon to scoop out the seeds. Separate the seeds from pumpkin flesh and strings as much as possible. Yes, this is the messiest step, but also one of the most enjoyable!
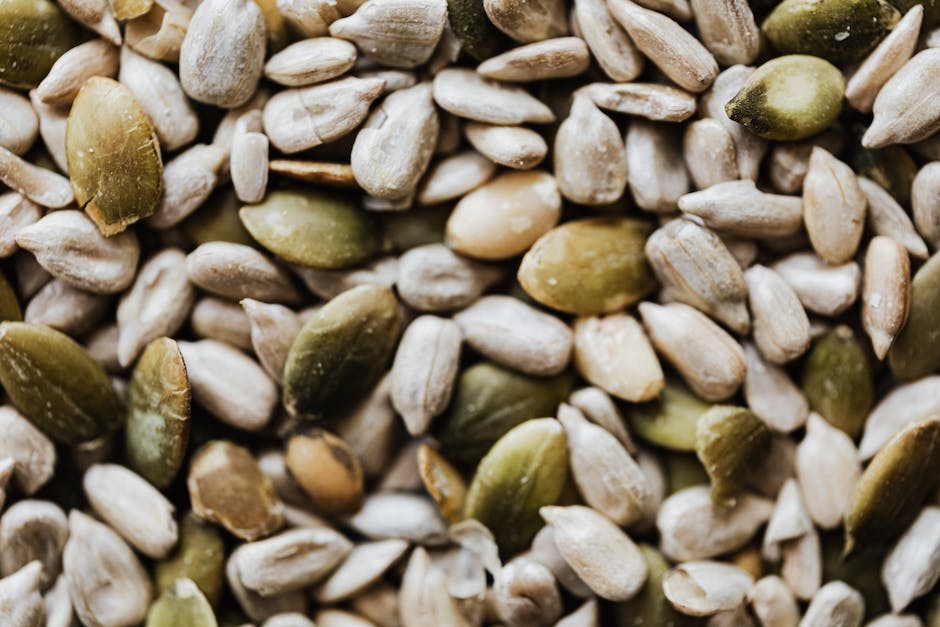
- CLEAN THE SEEDS: Transfer all the separated seeds into a colander. Rinse with water to help remove any remaining pumpkin matter.
- SORT THE SEEDS: It’s essential to hand-sort the seeds after rinsing, removing any small, broken, or immature seeds. Only the fattest, healthiest seeds will create robust plants next spring.
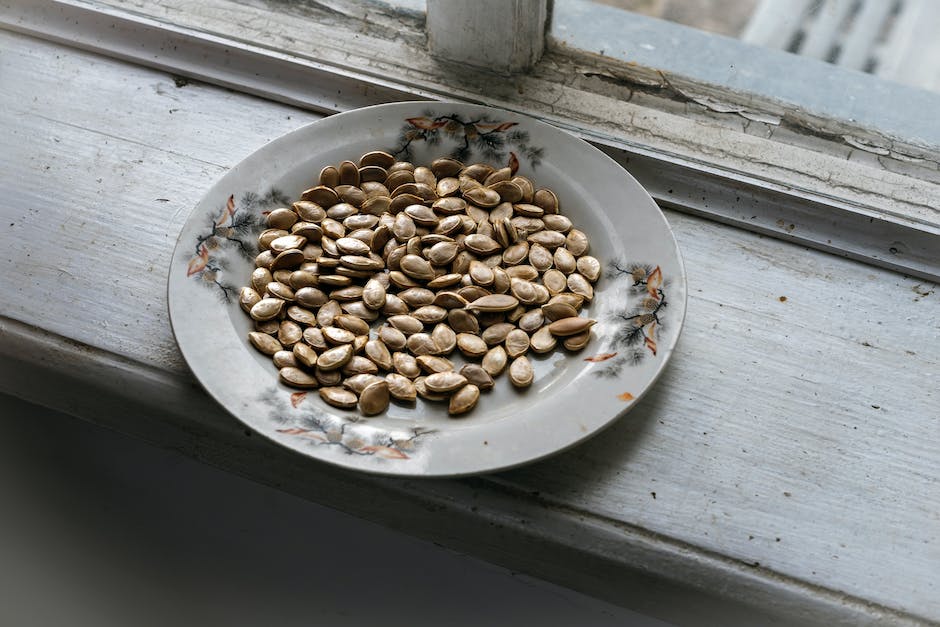
- DRY THE SEEDS: Spread the healthy seeds onto a cookie sheet in a single layer. It’s crucial to let them dry completely at room temperature. This drying process could take a few weeks, but patience will ensure that your seeds don’t grow mold or spoil when stored.
- STORE THE SEEDS: After drying, place the seeds into an envelope or airtight container. Label with the type and year to keep track.
That’s it! You’ve now become a pro in harvesting and preserving pumpkin seeds. With these expert steps, you’ll ensure a continuous, lush harvest in all future seasons, and perhaps, an endless supply of warm, comforting pumpkin soup. Here’s to many fruitful pumpkin seasons ahead!
Drying Pumpkin Seeds
The Art of Perfectly Preserving Your Pumpkin Seeds: A Detailed Guide to Drying
To the aficionado of gardening and harvest preservation, drying pumpkin seeds holds a special charm. It’s a blend of technique, timing, and patience that yields a product of superior quality that can be enjoyed for months to come. So, you’ve harvested, cleaned, and selected the best of your pumpkin seeds. And, now we are ready to delve into the core process of drying your pumpkin seeds.
- Setting Them to Dry: A pre-requisite to the drying process is a suitable drying area. It should be well-ventilated, and out of direct sunlight to prevent the seeds from losing their nutritive properties. Lay out the seeds in a single layer, without overlap, on a segment of wax paper, parchment paper, or a clean dish towel. Remember, the concept here is to encourage airflow around the seeds and prevent them from sticking to the surface, which certain materials (like paper towels) may otherwise encourage.
- The Waiting Game: This is where patience as an enthusiast pays off. The drying process will typically take one to two weeks, depending on surrounding humidity levels. Resist the urge to speed the process along with any external heat source or putting them in the sun as it risks cooking them slightly, changing the texture, flavor, and reducing their germination rate. Regularly, around every day or two, turn and stir the seeds to promote uniform drying.
- Tell-tale Signs of Readiness: It’s critical to ensure that your seeds are thoroughly dry before storage, as any retained moisture can culminate in mold formation and spoilage. How do you know they’re ready? The test is straightforward – your pumpkin seeds should be hard and brittle. If the seed snaps cleanly when bent, rather than bending or squishing, it’s dry.
- Swift Storage: Without delay, upon reaching the ideal dried state, the pumpkin seeds must be moved to appropriate storage containers. For best results, use airtight containers like mason jars, sealed plastic bags, or vacuum-sealed pouches. Always store in a dark, cool place away from direct sunlight to maintain the seeds’ quality and prolong their shelf-life. Furthermore, do not forget to label your seeds, marking their type and the date of storage.
Remember, the process of drying pumpkin seeds is an art. Just like any other art form, it requires proper technique, patience, and care. This detailed, methodical approach will gift you with pumpkin seeds that are impeccably preserved, ready for planting, baking, or simply enjoying as a healthy snack whenever the mood strikes. The time invested brings a reward that goes beyond the tangible, immersing you in the connection with nature and the satisfaction that can only be found through mastering your craft. With drying pumpkin seeds, not only do you extend their shelf-life, but you also amplify the pleasures of garden-to-table self sufficiency. Peace, love, and pumpkins, y’all!
Storing Pumpkin Seeds
Heading forward on the pumpkin-laden journey, let’s dive into the nuances of storing pumpkin seeds for future planting.
All the top-gun gardeners, seasoned ones, and even beginners would agree that proper storage goes a long way. It significantly enhances the seeds’ viability, which is undoubtedly a crucial factor in achieving a fruitful future planting episode. So, let’s get on with spilling the beans, rather, storing them!
After the intense dance of separation, cleaning, sorting, and drying – which includes creating an ideal drying environment, extending patience during the process, and reserving excitement, enters this beautiful phase of storing. It’s much like putting your beloved painting aside for a grand exhibit at a later point; preserving its richness, its essence so that when the curtain lifts, it stuns the audience with its beauty. And while growers yearn to admire the pretty pumpkins hanging in their garden, begin by attending the seeds because undoubtedly, it’s where the magic dwells!
Step into this with fully dried pumpkin seeds. A wonder trick to determine their storage-readiness? Hold a seed and try breaking it; if it snaps cleanly rather than bending, voila! they are all set for storage. A garden filled with beautiful and lush pumpkins starts right here, right amongst these small, seemingly insignificant seeds.
Options for storing dried pumpkin seeds are many, and gardeners can use envelopes, jars, or even plastic freezer bags – whatever goes with your convenience and availability. The creme-de-la-creme approach would be to use an airtight container, preventing the entrance of any moisture, leading to mold, which will flunk your pumpkin dreams right away. It is essential to know that the storage site should be cool and dark – your refrigerator can be an ideal choice, embracing the seeds at around 32-41 degrees Fahrenheit.
The seeds silently resting inside the containers carry the potential of painting your garden with dreamy pumpkins. To ensure that the future doesn’t confuse the past, label and date the stored pumpkin seeds. It helps in organization, yes, but most importantly, it triumphs in securing the quality of seeds, tracking their viability, and ultimately, the success rate. Attaching a simple label that states the type of seeds and date of harvest allows gardeners to have instant data access and plant accordingly.
In closing, one must remember there are no shortcuts to this art of storing pumpkin seeds, but mastering it surely gives an immense satisfaction. It illustrates self-sufficiency and resourcefulness; it refrains from the inclination of dependency over store-bought seeds year after year. The preservation of pumpkin seeds initiates an cyclical journey of self-reliance and provides an opportunity to embark on an exhilarating gardening endeavor, season after season. Keep those pumpkins coming!
With the knowledge you’ve gathered on harvesting, cleaning, drying, and storing pumpkin seeds, you are now equipped to take part in an eco-friendly activity that not only reduces waste but offers a satisfying experience leading to a beautiful pumpkin patch in next year’s garden. By practicing the correct storage methods, you can ensure that the seeds do not lose their vitality and are ready to sprout during the next planting season. Remember the key elements: dry thoroughly, store correctly, and take joy in knowing that your pumpkins will yield seeds for countless seasons to come. Ready to seize the spade, fellow gardener? It’s time for you to foster future generations of pumpkins and enjoy the fruits of your labor come next harvest season.


