
Caring for Norfolk Island Pines: Tips for Healthy Growth
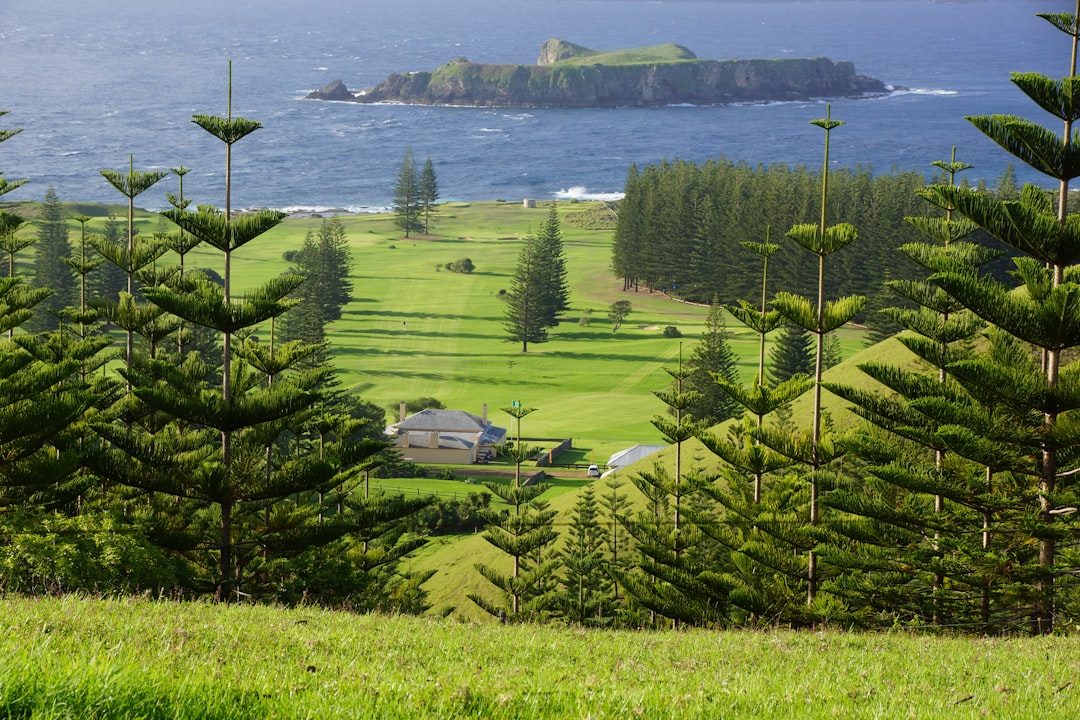
Norfolk Island Pines, scientifically known as Araucaria heterophylla, are beautiful evergreen trees that are native to Norfolk Island in the South Pacific. These trees have a rich history and have become popular in home decor due to their unique and attractive appearance. Norfolk Island Pines are not true pines, but they are often referred to as such due to their resemblance to pine trees.
Norfolk Island Pines can grow up to 200 feet tall in their natural habitat, but when grown indoors as houseplants, they typically reach a height of 6 to 10 feet. They have a symmetrical pyramidal shape with dense branches that are covered in soft, needle-like leaves. The leaves are dark green and have a glossy texture, adding to the plant’s overall appeal.
Due to their aesthetic appeal and ability to thrive indoors, Norfolk Island Pines have become popular choices for home decor. They can be used as standalone statement pieces or incorporated into larger indoor plant arrangements. Their unique shape and vibrant green color make them a versatile addition to any room.
Key Takeaways
- Norfolk Island Pines are popular indoor plants that resemble Christmas trees.
- Choose a location with bright, indirect sunlight and avoid placing them near drafts or heating vents.
- Use well-draining soil and avoid overwatering to prevent root rot.
- Mist regularly and maintain high humidity levels to mimic their natural environment.
- Fertilize sparingly and avoid using high-nitrogen fertilizers to prevent burning the roots.
Choosing the Right Location for Your Norfolk Island Pine
When it comes to choosing the right location for your Norfolk Island Pine, there are a few factors to consider. First and foremost, lighting conditions play a crucial role in the health and growth of these plants. Norfolk Island Pines thrive in bright, indirect light. They should be placed near a window that receives bright, filtered light throughout the day. Avoid placing them in direct sunlight as it can scorch their leaves.
In terms of temperature requirements, Norfolk Island Pines prefer moderate temperatures between 65 and 75 degrees Fahrenheit (18-24 degrees Celsius). They can tolerate slightly cooler temperatures but should be protected from drafts and extreme temperature fluctuations. Avoid placing them near heating vents or air conditioning units that can cause rapid temperature changes.
When selecting a location for your Norfolk Island Pine, it’s important to consider the size of the plant and its growth potential. These trees can grow quite tall, so make sure you have enough vertical space for them to reach their full height. Additionally, consider the proximity to other plants or furniture as the branches of Norfolk Island Pines can spread out and take up a significant amount of space.
Soil Requirements for Healthy Growth of Norfolk Island Pines
The quality of soil is crucial for the healthy growth of Norfolk Island Pines. These plants prefer well-draining soil that is rich in organic matter. A mixture of peat moss, perlite, and potting soil is recommended for optimal growth. This mixture provides good drainage while retaining enough moisture for the plant’s roots.
Maintaining proper soil moisture levels is essential for the health of Norfolk Island Pines. Overwatering can lead to root rot, while underwatering can cause the leaves to turn brown and dry out. It’s important to water the plant thoroughly when the top inch of soil feels dry to the touch. Allow excess water to drain out of the pot to prevent waterlogged roots.
To maintain proper soil moisture levels, it’s recommended to use a moisture meter or stick your finger into the soil to check for moisture. If the soil feels dry, it’s time to water your Norfolk Island Pine. During periods of active growth, these plants may require more frequent watering, while in winter months they may need less frequent watering.
Watering and Humidity Needs of Norfolk Island Pines
| Watering and Humidity Needs of Norfolk Island Pines | |
|---|---|
| Watering Frequency | Once a week |
| Watering Amount | Enough to moisten the soil, but not soak it |
| Humidity Level | Between 50% and 60% |
| Signs of Overwatering | Yellowing or dropping of leaves, root rot |
| Signs of Underwatering | Dry, brown or crispy leaves |
Proper watering is crucial for the health and vitality of Norfolk Island Pines. These plants prefer consistently moist but not waterlogged soil. As mentioned earlier, it’s important to water them when the top inch of soil feels dry to the touch. Water thoroughly until water drains out of the bottom of the pot.
In addition to proper watering, humidity is also important for Norfolk Island Pines. These plants are native to tropical regions and thrive in high humidity environments. Dry indoor air can cause the leaves to turn brown and dry out. To maintain proper humidity levels, you can mist the leaves of your Norfolk Island Pine with water or place a humidifier near the plant.
Another method to increase humidity is to place a tray filled with water near the plant. As the water evaporates, it will increase the humidity around the plant. Grouping plants together can also create a microclimate with higher humidity levels. It’s important to monitor the humidity levels and adjust accordingly to ensure the health of your Norfolk Island Pine.
Fertilizing Your Norfolk Island Pine: Dos and Don’ts
Fertilization is important for the healthy growth and development of Norfolk Island Pines. These plants benefit from regular feeding during the growing season, which is typically from spring to early fall. A balanced, water-soluble fertilizer with equal amounts of nitrogen, phosphorus, and potassium is recommended for Norfolk Island Pines.
It’s important to follow the instructions on the fertilizer packaging for proper application rates. Over-fertilizing can lead to salt buildup in the soil, which can damage the roots of the plant. It’s better to under-fertilize than over-fertilize, so start with a diluted solution and gradually increase the strength if needed.
When applying fertilizer, it’s important to water the plant thoroughly before and after fertilization to prevent root burn. Fertilize your Norfolk Island Pine every 4-6 weeks during the growing season, reducing frequency during winter months when growth slows down.
Pruning and Shaping Your Norfolk Island Pine
Pruning and shaping Norfolk Island Pines not only helps maintain their desired shape but also promotes healthy growth. Regular pruning helps remove dead or damaged branches, improves air circulation, and encourages new growth. It’s best to prune these plants in early spring before the start of the growing season.
When pruning Norfolk Island Pines, it’s important to use clean, sharp pruning shears to make clean cuts. Avoid tearing or ripping the branches as this can cause damage to the plant. Start by removing any dead or yellowing branches, then shape the plant by selectively pruning branches to maintain its desired shape.
To maintain the desired shape of your Norfolk Island Pine, it’s important to prune regularly. This will prevent the plant from becoming too leggy or top-heavy. It’s also a good idea to rotate the plant every few months to ensure even growth on all sides.
Pests and Diseases to Watch Out for in Norfolk Island Pines
While Norfolk Island Pines are generally resistant to pests and diseases, there are a few common issues to watch out for. Spider mites and mealybugs are two common pests that can infest these plants. Spider mites are tiny insects that feed on the sap of the plant, causing yellowing leaves and webbing. Mealybugs are small, white insects that leave a sticky residue on the plant.
To control these pests, you can use insecticidal soap or neem oil. Regularly inspect your Norfolk Island Pine for any signs of infestation and take action immediately if you notice any pests. It’s also a good idea to isolate any new plants before introducing them to your existing collection to prevent the spread of pests.
In terms of diseases, root rot is a common issue that can occur if the plant is overwatered or if the soil does not have proper drainage. To prevent root rot, make sure your Norfolk Island Pine is planted in well-draining soil and avoid overwatering. If you notice signs of root rot such as wilting leaves or a foul smell coming from the soil, it’s important to take action immediately by adjusting watering practices and improving drainage.
Propagating Norfolk Island Pines: Tips for Success
Propagating Norfolk Island Pines can be a rewarding experience for plant enthusiasts. There are a few methods you can use to propagate these plants, including seed propagation, stem cuttings, and air layering. Seed propagation is the most common method but can take several years for the plant to reach maturity.
To propagate Norfolk Island Pines from seeds, start by collecting mature cones from the tree. Place the cones in a paper bag and allow them to dry out for a few weeks. Once the cones have dried, gently shake them to release the seeds. Sow the seeds in a mixture of peat moss and perlite, keeping them moist but not waterlogged. It may take several weeks for the seeds to germinate.
Stem cuttings can also be used to propagate Norfolk Island Pines. Take a 4-6 inch cutting from the tip of a healthy branch and remove the lower leaves. Dip the cut end in rooting hormone and plant it in a mixture of peat moss and perlite. Keep the soil moist and place the cutting in a warm, bright location. Roots should start to develop within a few weeks.
Air layering is another method that can be used to propagate Norfolk Island Pines. This method involves creating a wound on a healthy branch, wrapping it with moist sphagnum moss, and covering it with plastic wrap. Roots will develop at the wound site, and once they have formed, the branch can be cut below the roots and potted up as a new plant.
Winter Care for Norfolk Island Pines: Protecting Your Plant from Cold Temperatures
Winter care is important for Norfolk Island Pines as they are sensitive to cold temperatures. These plants prefer temperatures between 65 and 75 degrees Fahrenheit (18-24 degrees Celsius). During winter months, it’s important to protect them from drafts and extreme temperature fluctuations.
Place your Norfolk Island Pine in a location that receives bright, indirect light during winter months. Avoid placing them near windows or doors that can let in cold drafts. If the temperature drops below 50 degrees Fahrenheit (10 degrees Celsius), it’s a good idea to move the plant to a warmer location or provide supplemental heat.
It’s also important to adjust watering practices during winter months. Norfolk Island Pines require less frequent watering during this time as their growth slows down. Allow the top inch of soil to dry out before watering and reduce the amount of water given to prevent overwatering.
Troubleshooting Common Problems with Norfolk Island Pines
Despite their resilience, Norfolk Island Pines can still encounter common problems. One common issue is browning or yellowing leaves, which can be caused by overwatering, underwatering, or improper lighting conditions. Adjusting watering practices and ensuring proper lighting can help resolve this issue.
Another common problem is the loss of lower branches, which can be caused by lack of light or overcrowding. If your Norfolk Island Pine is losing lower branches, it may be a sign that it needs more light or that it is being crowded by other plants. Adjust the lighting conditions and provide enough space for the plant to grow.
If you notice stunted growth or a lack of new growth, it may be a sign that your Norfolk Island Pine needs fertilization. Make sure you are regularly feeding your plant with a balanced fertilizer during the growing season to provide it with the necessary nutrients for healthy growth.
In conclusion, Norfolk Island Pines are beautiful and versatile plants that can thrive indoors with proper care and attention. They add a touch of elegance and natural beauty to any home decor. By choosing the right location, providing proper soil and moisture conditions, and following best practices for fertilization, pruning, and propagation, you can ensure the health and vitality of your Norfolk Island Pine.
It’s important to monitor for pests and diseases and take action immediately if any issues arise. Additionally, providing proper winter care and troubleshooting common problems can help maintain the health and appearance of your Norfolk Island Pine year-round.
Overall, Norfolk Island Pines are a wonderful addition to any indoor plant collection and can bring years of enjoyment with their unique beauty and resilience. With the right care and attention, these plants can thrive and become a focal point in your home. So go ahead, bring a touch of the South Pacific into your living space with a Norfolk Island Pine.
If you’re looking for more information on how to care for Norfolk Island Pines, be sure to check out this helpful article from Lawn World. They provide expert tips and advice on maintaining the health and beauty of these unique indoor trees. From proper watering techniques to ideal lighting conditions, this article covers all the essential aspects of Norfolk Island Pine care. Don’t miss out on this valuable resource – click here to read the full article on Lawn World’s website.
FAQs
What is a Norfolk Island Pine?
A Norfolk Island Pine is a type of evergreen tree that is native to Norfolk Island, a small island in the South Pacific. It is often grown as a houseplant in colder climates.
How do I care for a Norfolk Island Pine?
To care for a Norfolk Island Pine, you should place it in a bright, indirect light and keep the soil moist but not waterlogged. You should also mist the tree regularly and fertilize it every few months.
What kind of soil does a Norfolk Island Pine need?
A Norfolk Island Pine needs well-draining soil that is rich in organic matter. You can use a mixture of peat moss, perlite, and sand to create the ideal soil for your tree.
Can I prune my Norfolk Island Pine?
Yes, you can prune your Norfolk Island Pine to control its size and shape. However, you should only prune the tree in the spring or summer, and you should avoid removing more than 1/3 of the tree’s foliage at one time.
What kind of pests and diseases affect Norfolk Island Pines?
Common pests that affect Norfolk Island Pines include spider mites, mealybugs, and scale insects. Diseases that can affect the tree include root rot and needle blight.
Can I propagate my Norfolk Island Pine?
Yes, you can propagate your Norfolk Island Pine by taking stem cuttings in the spring or summer. You should remove the lower leaves from the cutting and dip the cut end in rooting hormone before planting it in a pot with well-draining soil.


