
Easy Steps to Save Pumpkin Seeds for Planting

Harvesting pumpkins is a golden tradition marking the arrival of fall, but what if it could mean more than just the advent of a new season? What if each plump, orange pumpkin held the potential for a future crop, passing on a legacy from one growing season to the next? You can tap into this incredible cycle of life by saving pumpkin seeds for planting, an enriching activity rooted in sustainable practices. There’s a rich symphony of knowledge and skill to master, from understanding how to select suitable pumpkins that yield vibrant, healthy seeds, to the intricate art of extracting, cleaning, and storing them properly.
Selecting the Right Pumpkins
Pumpkin patch prowlers, unite! There’s something uniquely satisfying about appreciating the life cycle of our favorite orange globes. While most folks consider size, shape, and color when selecting the perfect pumpkin, save a thought for those tiny gems inside – the seeds! For the committed pumpkin enthusiast, seed saving can provide countless hours of fascinating observation and immense satisfaction. So, what are the characteristics to prioritize when picking pumpkins for seed saving? Let’s delve into the details!
Ideally, one should aim for heirloom or open-pollinated pumpkin varieties, as these are genetically stable. This means the plant you grow from these seeds will reliably resemble the parent plant. Selecting hybrid pumpkins might give you some interesting results, but unfortunately, they probably won’t resemble the original plant.
Size does matter; opt for medium-to-large pumpkin varieties. Generally, they possess a larger quantity of seeds inside, which ultimately increases your chance to find a healthy handful for saving. But remember, bigger isn’t always better. An excessively large pumpkin may have too fibrous internal flesh, making seed extraction a messy affair!
A pumpkin’s maturity is crucial when preserving seeds. Make sure your chosen pumpkin is fully matured, nothing less! Immature seeds lack hardness and the capacity to germinate. So, how to confirm a pumpkin’s maturity? Start with the tap test. Thump your pumpkin gently; a mature pumpkin rings with a hollow sound. Also, check its color. Mature pumpkins are uniformly colored without green spots.
Inspect, inspect, inspect! Be diligent and choose a pumpkin free of cuts, bruises, or blemishes. This might indicate the pumpkin has started to rot internally, drastically reducing the seed’s viability. Additionally, make sure there’s no sign of disease or pest damage to the pumpkin shell. Only the healthiest pumpkins pass this rigorous test!
Don’t shy away from experimenting with unique pumpkin varieties. Choose different shapes, colors, and types that catch your eye! After all, growing your own plants from your saved seeds adds an exciting edge to your pumpkin-growing hobby.
After mastering the art of choosing pumpkins for seed saving, you’re ready to embark on your next self-sufficient gardening adventure. Just remember, this hobby is a mixture of science and art, wrapped with patience and sprinkle with a dash of luck! Happy pumpkin hunting!

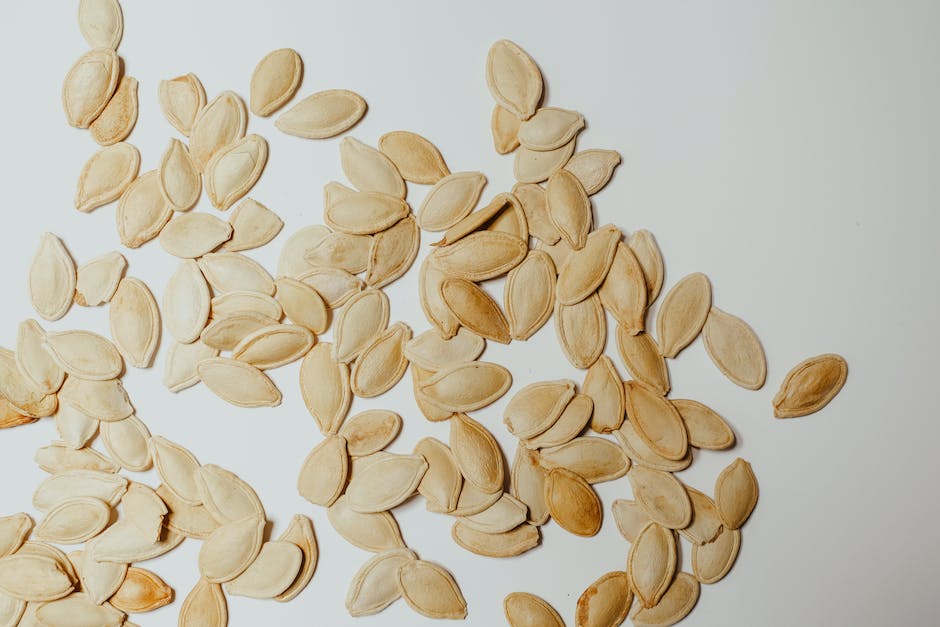
Photo by shaunholloway on Unsplash
Extracting and Cleaning Pumpkin Seeds
The Perfect Guide for Extracting and Cleaning Pumpkin Seeds
For all the seed-saving enthusiasts out there, let’s delve deeper into the world of pumpkins and discover the art of correctly extracting and cleaning their seeds! A good grasp of this little-known skill can be truly riveting, transforming your pumpkin-growing experience into something completely novel!
Step 1: Choosing the Pumpkins
After ensuring your chosen pumpkin variety meets the aforementioned criterias – ripe, undamaged, free from rot, and an heirloom or open-pollinated variety, it’s time to kickstart our seed extraction process. Make sure to pick your most prime pumpkins for this to ensure the health and vitality of your future crops!
Step 2: Cutting the Pumpkins
When you’ve chosen your champion pumpkin, it’s time for the first incision. Cut around the top of the pumpkin as if you were about to carve a Halloween jack-o’-lantern, leaving a large enough hole to comfortably get your hand into the pumpkin’s cavity.
Step 3: Extracting the Seeds
The inside of the pumpkin is filled with pulp and seeds. Simply reach in and pull the seeds and pulp out together. A wooden spoon or ice scoop can be used to scrape off the remaining seeds clinging onto the inner wall of the pumpkin.
Step 4: Separating the Seeds from the Pulp
Doing this correctly is crucial for the longevity of your seeds. To separate the seeds from the pulp, place your extracted pulp and seeds into a large bowl of water. Remember, the viable seeds will sink while the pulp and less desirable seeds will float, making the separation process significantly easier.
Step 5: Washing the Seeds
Once separated, rinse the good seeds under a strainer to remove any remaining pulp. Be sure to use cold, running water and gently rub the seeds to ensure they are thoroughly cleaned. Avoid using soap or any detergents, as these may interfere with germination.
Step 6: Drying the Seeds
Spread out the clean seeds in a single layer on a flat surface, preferably on a piece of newspaper or wax paper for a few days until they dry completely. Remember to turn the seeds once or twice a day for even drying. Avoid placing them directly under the sun as this might result in the seeds losing their ability to germinate.
Step 7: Storing the Seeds
After making sure your seeds are completely dry, store them in an envelope in a cool, dry place until they’re ready to be sown. Writing the variety and date of harvest on the envelope will help keep track of what’s inside.
And there you have it! The perfect guide to extracting and cleaning pumpkin seeds! In this journey, you may find satisfaction in the nuance of each pumpkin variety, taking delight in the potential that each tiny seed holds. Enjoy the process, and remember that every little bit of expertise acquired in this journey will only serve to enrich your seed-saving repertoire.
Drying and Storing the Seeds
Mastering the Art of Drying and Storing Pumpkin Seeds
Stepping further into the fascinating hobby of pumpkin seed cultivation brings us to an intricate stage – the process of correctly drying and storing the seeds. While the earlier phases of selection and extraction are essential, it is this period of drying and preservation that ensures our seeds maintain their optimum health and vigor.
Once successfully washed, pumpkin seeds should be dried on sheets of wax paper, not clinging to each other. Cloth towels aren’t advisable as seeds might stick to them, proving difficult to remove later. For drying these seeds, patience is crucial. Allow them to air-dry in a cool, airy room, away from direct sunlight for about a week. Hastening this stage could lead to inefficient drying, which may impact the seeds’ longevity and ability to sprout.
After a week, the seeds should have reached a point of perfect desiccation. One way to tell if a seed is adequately dehydrated is through the ‘snap test’. When attempting to bend dried pumpkin seeds, they should snap cleanly, without any bend or give. If it bends, it’s a signal that it needs more time to dry out.
Once ensured of the seeds being thoroughly dried, next comes the careful process of storage. This step is vital since improperly stored seeds can become susceptible to mould and pests, reducing the possibility of successful sprouting in the future.
Storing these dried pumpkin seeds in a glass jar with a tight-fitting lid works magnificently well. A touch of tradition, along with practicality, mason jars are used often for their seal-tight lids and transparency, allowing one to monitor the seeds easily. The seeds stay best when stored in cool, dark spaces such as a kitchen cupboard or basement.
Another trusted long-term storage option is the usage of envelopes or paper bags – breathable materials that do not trap moisture. On these containers, one should mention the pumpkin variety and the date of storage, keeping the seed-saving hobby organized and efficient.
While pumpkin enthusiasts frequently check on their seeds, it’s important not to open the containers too often, which may cause moisture to enter and spoil the seeds. It’s the delicate orchestration between sufficient attention and undue tampering that balances the equation.
So, here’s to all dedicated squash cultivators, may these insightful practices guide you on your path of dry storing your precious pumpkin seeds and aid in your journey towards becoming a seed-saving maven! Dive more deeply into the captivating world of pumpkin growth, using these expert guidelines and preserve the wonder of this hobby for years to come.
Engaging in the preservation and planting of pumpkin seeds does not merely bring in a new hobby but also reconnects us with the cycles of nature. As you delve into the intricacies of selecting ripe, healthy pumpkins, carefully extract and meticulously clean the seeds, you are participating in a journey that is thousands of years old. Not to mention mastering the precision of drying and storing, all to ensure their vitality. By adopting such sustainable practices, you are embodying the essence of nature’s endless cycle – encapsulating life within a tiny seed, promising a plethora of bountiful, golden pumpkins in the season to come.


