
Efficient Steps to Root an Aloe Vera Plant

Aloe Vera, a succulent species known for its medicinal properties, offers an extraordinary blend of nourishment and healing qualities. While it’s often used directly from its leaf or as a key ingredient in health and skincare products, cultivating your own plant can provide a fulfilling endeavor. This document offers a comprehensive guide to rooting an Aloe Vera plant, beginning with an in-depth understanding of its intricate anatomy. Recognizing the distinct configuration and role of the root, stem, leaves, and other parts sets a foundation for success.
Just as significant as grasping the plant structure is mastering the technique of cutting Aloe Vera without inflicting damage to the plant or threatening its survival. Subsequently, the information will guide you through best practices for rooting the cuttings. This will include choosing the best soil mixture, the right pot, an appropriate watering schedule, and other essential steps.
Understanding the Anatomy of an Aloe Vera Plant
Headline: Unveiling the Marvels of the Aloe Vera Plant’s Anatomy
Inching into the world of Aloe Vera cultivation is a delightful venture. A wealth of knowledge awaits those eager to decipher the stimulating complexities of the Aloe’s anatomy. A crucial part of nurturing this miraculous succulent, understanding its various parts and functions serves as the foundation of a successful hobby.
At first glance, the Aloe Vera plant appears deceptively simple — a cluster of thick, fleshy leaves spilling out from the center. However, upon closer inspection, it reveals fascinating characteristics decoded in its anatomy – the leaves, latex, gel, flowers, and roots. Each part has a critical role in the plant’s lifecycle, contributing to its adaptation, reproduction, and renowned healing attributes.
- The Leaves: Aloe Vera’s true powerhouse
- The Latex: Nature’s bitter safeguard
- Aloe Gel: The healing heart
- Flowers: A fiery attraction
- Roots: The silent nourisher
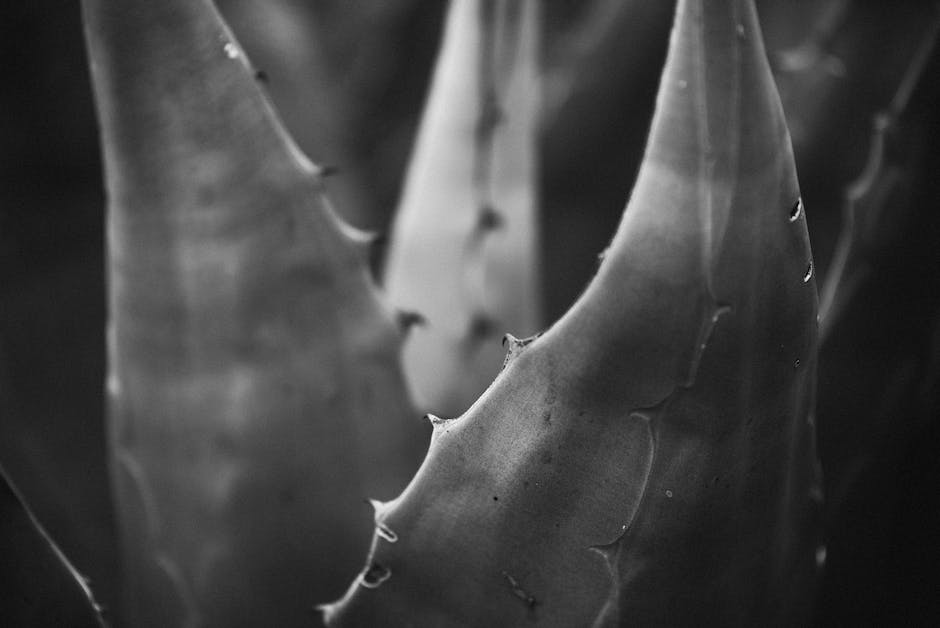
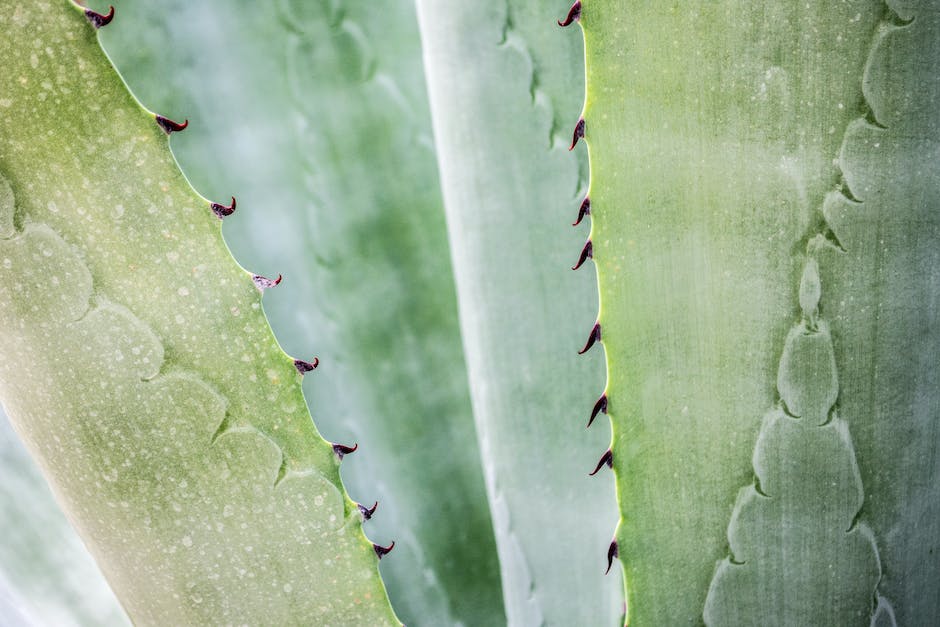
Undoubtedly, the Aloe Vera’s claim to fame is its meaty leaves. Overlapping in a rosette fashion to form a left-hand spiral, these thick, fleshy troves are the storehouses of the plant’s potent therapeutic qualities. Composed mostly of water, they serve to retain moisture, helping the plant to survive in harsh, arid environments. The leaves’ outer protective layer is the epidermis, coated with a cuticle that prevents water loss and safeguards from disease and insects.
Situated right below the leaf’s skin lies a vascular bundle that contains a yellow-orange substance, the latex. This bitter-tasting sap is a defense mechanism against hungry grazers. But caution is necessary as the latex contains aloin, a compound with potent laxative properties. Be cautious with it as it may cause negative side effects when ingested.
Tucked beneath the latex lies the clear, jelly-like substance known universally for its nutritional and medicinal properties, the Aloe gel. It contains polysaccharides and glycoproteins – compounds that contribute to its anti-inflammatory and immune-boosting capabilities. Harvesting this regenerative powerhouse without contaminating with latex requires precision, but the reward is a safe, natural remedy for an array of skin conditions.
Adding a dash of color to the Aloe Vera’s green charm, the tubular flowers bloom annually from a central stalk. Swinging from yellow to red, they attract pollinators, securing the plant’s propagation. However, it’s good to note that indoor potted Aloe Vera may not flower equivalent to their outdoor brethren, as they require more sunlight.
Last but not least, the Aloe Vera’s roots, often overlooked but vital. They serve as the plant’s anchor and as the passage for water and nutrients. Unlike most plants, these shallow, radial roots spread horizontally, increasing water absorption’s efficiency.
Understanding the intricacies of the Aloe Vera’s anatomy caters to a more comprehensive cultivation approach. With this knowledge in your arsenal, may your journey through the landscape of Aloe Vera caretaking be one filled with success and fulfillment.
Proper Cutting Techniques for Aloe Vera
The Art of Aloe Vera Propagation: A Perfect Cut Guide
Entering the gratifying world of aloe propagation is an enchanting journey. This hardy plant, forgiving of neglect yet responsive to care, invites everyone from green-thumbed gurus to budding botanists, to delve into its wonders. Naturally, propagation, or the process of growing new plants from a variety of sources, stands as one of the pivotal skills in harnessing the full potential of aloe vera. Done correctly, this practice gifts propagators with a plethora of lush, lively aloe babies ready for growth.
Before you begin your aloe propagation adventure, gather some prerequisites: clean, sharp pruning shears or a knife, and a dry, warm spot for pre-treatment. Imperative is a clean cut, both for the parent plant’s health and the offshoot’s successful growth.
Adept aloe handlers will tell you that gently removing the baby plant – or pup – from the parents at its base is the most successful way to propagate. Look closely for a healthy, vigorous pup growing at the base of the parent plant, ideally with four to five leaves of its own. Position your tool at the intersection point between the parent plant and the pup and make a sharp, swift cut. If the mother plant is mature and sturdy, you might be able to wiggle the baby plant free with your hands.
While leaf-cutting can be a method of aloe propagation, it fares as more challenging and less guaranteed than pup propagation. If opting for this path, select a robust, healthy outer leaf nearing the plant’s base. Make a swift, clean cut across the aloe leaf close to the base. The key here lies in precision; any ragged cuts can risk infection and jeopardize the cutting’s growth potential.
Post-cut, it’s essential to take a brief pause. A sort of aloe plant TLC, if you will. Let the cut surface air-dry for a couple of days in a warm, shades spot. The called process known as ‘callusing’, aids in forming a protective layer over the cut surface. This simple step potently prevents infection and decay during the growth phase.
Once the cuts are dry and have callused, it’s planting time! Both the pups and leaf cuttings need well-draining soil to thrive and prevent root rotting. Plant your propagated Aloe vera babies in a fresh mix of soil that’s two-parts sand or perlite and one-part peat moss or compost. Make sure to water sparingly at first, letting the soil fully dry out between waterings.
A quick note on lighting – place your new propagates in bright but indirect light. Too much direct sunlight can cause their leaves to wilt and yellow, affecting their overall health and vitality.
Aloe vera propagation calls for patience and careful observation, but once you’ve got the knack for it, you’ll be blessed with an ever-growing aloe family before you know it. With this wealth of propagation knowledge, there are boundless chances for many successful aloe propagations ahead. Embrace these tried-and-true techniques, and remember, the beauty of aloe vera cultivation lies within the very journey—it’s the love, the care, and the joy that truly make the difference. Happy propagating!
Correctly Rooting an Aloe Vera Cutting
Aloe Vera propagation offers a delightful and rewarding experience for garden enthusiasts. Applying the right propagation strategies can see a single mother plant birthing multiple baby plants or “pups” that will broaden your aloe vera collections in no time.
Before launching into propagation, ensure you have a healthy mature Aloe Vera plant. Only mature plants with established root systems can produce pups.
There are two popular methods of Aloe Vera propagation: pup propagation and leaf cutting. Of the two, pup propagation is especially satisfying as it provides baby plants that are exact replicas of the mature plant.
In pup propagation, pups are detached from the base of the parent plant. Carefully unearth the baby plants, ensuring minimal damage to the main root system. Make sure each pup has an attached root portion – this will help foster a steadier transition to independent growth.
Leaf cutting, on the other hand, involves snipping a sizeable leaf portion from the mature plant. While not as reliable as pups, leaf cuttings are an alternative method of propagating your aloe vera.
Post-cutting, it’s crucial to allow for air-drying and callusing. This process hardens off the raw cut surfaces, reducing the chances of rotting when the propagated pieces are planted. Cut leaves or pups should air dry for several days so the cuttings can recover and begin developing new tissue.
Planting time arrives once the cuttings are well callused. The pups or leaf cuttings are best potted in a soil mix with excellent drainage to mirror the aloe’s natural arid climate. A mix of potting soil, pumice, and coarse sand is recommended.
Watering is critical in Aloe Vera cultivation. Generally, it’s best to err on the side of under-watering than over-watering. The soil should be allowed to dry out between watering thoroughly, as waterlogged soil can lead to root rot and plant stress.
Illumination is another important aspect. While Aloe Vera plants love bright light, they require some protection against harsh, direct sunlight. Therefore, a spot with filtered sunlight would be perfect. Indoors, place the plant near a sunny window, but avoid intense, midday sunlight.
Propagating Aloe Vera requires a fair share of patience and observation. It might be several weeks before noticeable growth occurs. But remember – a keen eye on your plant’s health, regular checks on soil moisture, and ensuring the right light conditions will ensure your Aloe Vera propagation journey is a great success.
Aloe Vera propagation is indeed a gratifying venture. Seeing those little pups thriving into robust plants brings immense satisfaction. Get started, embrace the art of aloe propagation, and reap the rewards of being a cultivator of this remarkable plant.

After taking you through a step-by-step guide, starting with a deep understanding of Aloe Vera anatomy and ending with successfully caring for your rooted plant, we trust that you’re equipped to embark on your own cultivation journey. With these factors carefully considered and meticulously performed, your Aloe Vera plant has the potential to flourish and provide you with an endless source of its well-documented benefits.
Aloe Vera, a common houseplant, truly is more than just a pretty plant. As your plant grows and multiplies, you’ll enjoy the view, knowing you’ve grown it from a mere cutting. Ultimately, the knowledge attained in this guide should act as a stepping stone for those aiming to explore the wonderfully healing Aloe Vera plant. All that remains is to roll up your sleeves and dig into the process of rooting and caring for your own Aloe Vera plants.


