
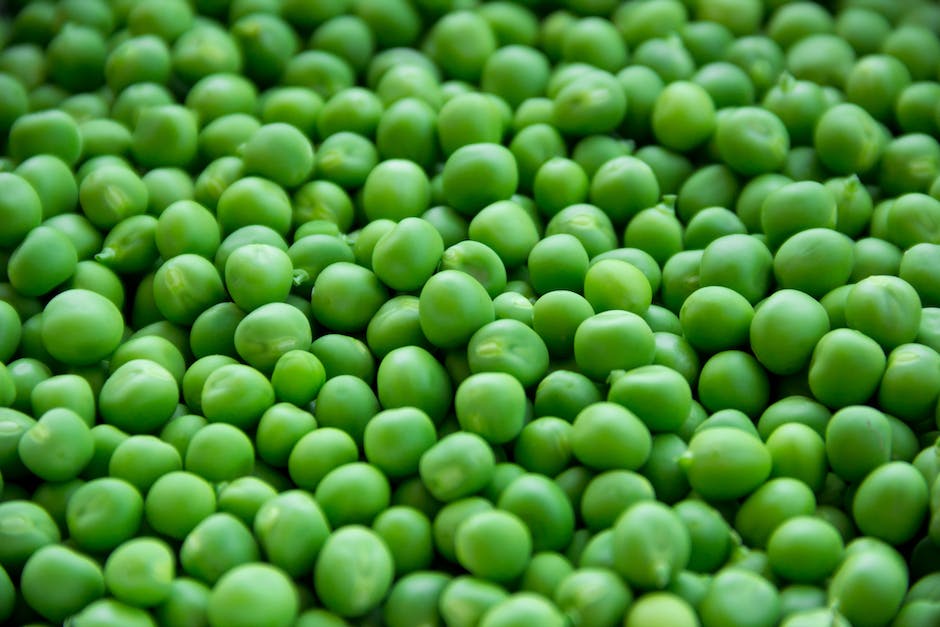
Effortless Steps to Grow Sugar Snap Peas
Home gardening can bring immense delight, particularly when you harvest your very own fresh and crisp sugar snap peas. Growing these sweet, crunchy legumes is more straightforward than you may imagine, but there are significant points to understand to ensure a prosperous yield. This guide will navigate you through the essential steps, starting with suitable soil preparation for sugar snap peas. To attain fruitful pea plants, it’s crucial to know the optimum soil conditions, including pH level, drainage, and soil enrichment for nutrient requirements. Moreover, learning the art of planting and caring for sugar snap peas is indispensable. It encapsulates understanding the right depth for planting seeds, recommended distance between plantings, the perfect temperature range, plus how to water and fertilize for maximal growth.
Soil Preparation for Sugar Snap Peas
The Sweet Secrets for Prepping Soil for Sugar Snap Peas
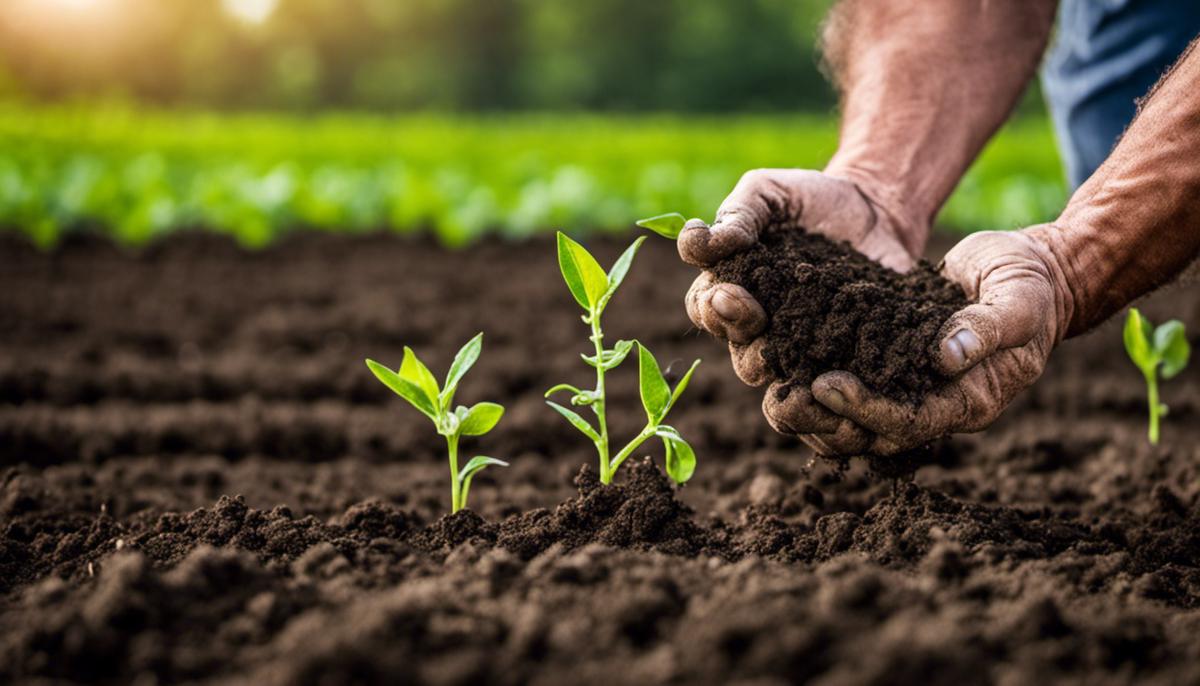
If you’re a fan of sugar snap peas like many gardening enthusiasts, knowing how to prepare your plot is absolutely vital. Sugar snap peas require specific soil environmental conditions to thrive and yield a sweet, robust harvest. Worry not, fellow gardening fans, because the keys to unlocking the perfect pea plot are right here for your green-thumbed exploration.
First and foremost, the gold standard for sugar snap peas is well-drained, loamy soil with a pH between 6.0 and 7.0. The peas aren’t fussier beyond that, making them ideal for beginners and experts alike. If the soil in your garden doesn’t fit this perfect pea profile, there are several ways to amend it.
Compost is a fundamental tool in the soil-prepping journey. A rich and organic compost not only aids drainage but also enriches the soil. Before planting, mix compost into the soil to a depth of 2 inches. This organic matter will decay over time gradually, releasing nutrients that encourage the sugar snap peas to grow strong and healthy.
A soil test is an excellent way to gauge the pH level of your soil. The results will confirm whether lime (to decrease acidity) or sulfur (to increase acidity) is needed. These amendments are critical – don’t underestimate their value. They ensure your peas have the perfect environment to sprout and flourish.
Once you receive your soil test results, add the needed amendments based on the recommendations. Doing this around two weeks before planting gives the soil enough time to adjust. Don’t worry if you’ve never done this before; gardening centers are a wealth of knowledge and can guide you in purchasing and using the right amounts of lime or sulfur.
Sugar snap peas, an early spring crop, like cool soil temperatures, but not too chilly that seed rot becomes an issue. Planting them as soon as the soil is workable – typically when it reaches around 45 degrees Fahrenheit – will definitely provide an optimum growth environment.
A word for the wise, an extra dash of phosphorus at the time of planting can provide a bonus for your budding peas. Phosphorus aids in root development, which in turn supports healthy plant growth and a bountiful harvest. Just a light sprinkling of bone meal or rock phosphate around the planting area will suffice.
Finally, keep in mind that these peas prefer a sunny location to grow. A sunny, properly drained, and loamy plot is the ultimate sugar snap haven. So, choose your planting site wisely and follow the above tips to give your sugar snap peas the best chance of thriving. Now you’re ready to enjoy the mesmerizing garden process and soon, your own crisp harvest of sugar snaps. Passion for peas and patient preparation – they’re the sweetest peas in the pod!
Planting and Care of Sugar Snap Peas
Title of Article: Mastering the Art of Sugar Snap Peas: Planting and Care
If you’re a fan of the lush, edible pod of the sugar snap pea, this guide will help you master the art of growing them. This hardy, cool-weather vegetable is not only easy to grow but also surprisingly satisfying once you get the knack of planting and caring for them. So here’s how to bring the sweet crunch of homegrown sugar snap peas to your dinner table.
To start, always soak your seeds overnight. This step quickens germination and encourages the development of a stronger root system. Use a bowl or jar filled with room temperature water, and by morning, you’ll find your seeds plump and ready for planting.
Now, let’s talk planting depth and spacing. Sugar snap peas love to grow upwards, using their tendrils to climb. Plant your seeds about 1 inch deep, and space seeds 1-3 inches apart in the row. Rows should be spaced 18-24 inches apart. If you’re growing your peas on trellises (which they love!), plant seeds on both sides for maximum yield.
Watering is essential. To establish peas, water them well at planting and again seven days later if there’s no substantial rainfall. Continue to water regularly for the duration of growth, providing about 1 inch of water per week. However, avoid overwatering, as this can cause seed and root rot.
As for fertilization, refrain from laying heavy nitrogen fertilizers. Your peas are legumes, fixing their nourishment in their roots. If your soil fertility is adequate, your peas won’t need further fertilization beyond the phosphorus added at planting time.
Now, some friendly tips on pest control. Your sugar snap peas might be visited by pests like aphids and birds. Encourage beneficial insects, like ladybugs and lacewings, which will feed on these aphids. A lightweight bird netting over the top of the plants can deter birds from nibbling at your peas.
Finally, when it comes to harvesting, remember that timing is key. Your sugar snap peas are best when they’re plump, just before the peas inside start to bulge. Ensure to pick pods from the bottom of the plant and work your way up. Harvest frequently to keep the plants productive and enjoy a steady supply of fresh peas throughout the season.
Planting and caring for sugar snap peas might seem like a challenge initially, yet with these practiced tips and a little persistence, you’ll be on your way to mastering this sweet, crisp pea. Happy gardening, fellow green thumbs!
Harvesting Sugar Snap Peas
The Magic Moment: Harvesting Sugar Snap Peas
Once they’ve set up their perfect garden patch and have lovingly cultivated their sugar snap peas, many garden enthusiasts raise an important question: when and how do we actually harvest these delicious green goodies? After years of trial and error, finding that magic moment and technique for harvesting sugar snap peas can take some practice, but we’re here to make sure it’s a joyful experience rather than a stressful one.
To start, remember the saying, “Size doesn’t matter”? In the case of sugar snap peas, nothing could be truer. It is best to focus on the plumpness rather than the length of the pods. When the outline of the peas inside the pod begins to show, that means they’re ready for the picking. This might be slightly different between varieties and growing conditions and would typically fall somewhere around 60 days after sowing.
Timing is essential for harvesting sugar snap peas. If picked too early, the peas will be small and the flavor will not yet be fully developed. Yet, if harvested too late, they’ll become tough and lose their sweetness. It’s all about honing your observation skills and striking when the proverbial pod is ripe.
Getting the method right is just as crucial as timing. When harvesting, the key is to not damage the plant or pull off more pea pods than intended. An easy way to do this is by holding the stem with one hand and the pod with the other, then giving a gentle yet firm pull. If done correctly, the pod should come off clean, leaving the stem intact for future production.
Indirect sunlight and cool temperatures help in keeping harvested peas fresh and sweet by preventing sugar conversion to starch. Hence, the best time to harvest these veggies would be early morning or late evening.
Continuous harvesting is another useful tip to remember. Yes, it may sound a little counterintuitive, but regular picking encourages the plants to produce more pods. Every 1 to 3 days, do a new harvest. Your human attention signals the plants into a frenzy of increased productivity, as they strive to ensure the survival of their lineage by producing more seeds (which, luckily for us, means more sugar snap peas to enjoy!).
So there you have it! When it comes to sugar snap pea harvesting, the mantra is observation, the right technique, and continuous harvesting. Remember, time and practice will help one get their green thumb, so don’t worry if the first few harvests aren’t perfect. Happy harvesting!

Photo by mtresemer on Unsplash
Once you’ve mastered the art of nurturing these delightful legumes, the final stride is knowing the right moment to harvest them. Picking sugar snap peas at the perfect timing is essential for the sweetest flavor, which is why the cues for harvesting will be thoroughly discussed. Furthermore, you’ll learn the proper technique of picking peas from the vine to motivate continual production. By following these instructions, you’ll be well-prepared to grow and enjoy your very own sugar snap peas, savoring the fruits of your labor with each bite. Remember, the key to a successful harvest lies in the attention to detail in every step, from soil preparation, planting, and care, to the moment of plucking them from the vine.


