
Green Thumbs: A Step-by-Step Guide on How to Successfully Transplant Your Aloe Vera Plant

Aloe vera plants are known for their numerous health benefits and their ability to thrive in a variety of conditions. However, as these plants grow, they may outgrow their current pots and require transplanting into larger containers. Transplanting aloe vera plants not only improves their growth and health, but also provides them with increased root space and better drainage. Additionally, transplanting can enhance the aesthetic appeal of the plant by allowing it to be displayed in a more visually pleasing pot. In this article, we will explore the benefits of transplanting aloe vera plants, when to transplant them, how to choose the right pot, how to prepare the plant for transplanting, step-by-step instructions for removing the plant from its current pot and transplanting it into a new one, proper watering techniques after transplanting, caring for the plant post-transplanting, and troubleshooting common issues that may arise during the process.
Key Takeaways
- Transplanting your aloe vera plant can help it grow larger and healthier.
- The best time to transplant your aloe vera plant is in the spring or summer.
- Choose a pot that is slightly larger than your current pot and has drainage holes.
- Before transplanting, stop watering your aloe vera plant for a few days to allow the soil to dry out.
- Gently loosen the soil around the roots and remove the plant from its current pot.
The Benefits of Transplanting Your Aloe Vera Plant
Transplanting your aloe vera plant can have several benefits for its growth and overall health. One of the main advantages is improved growth. As the plant grows, its roots may become crowded in its current pot, limiting their ability to expand and absorb nutrients. By transplanting the plant into a larger pot, you provide it with more root space, allowing the roots to spread out and grow more freely. This can result in healthier and more vigorous growth.
Another benefit of transplanting is increased root space. Aloe vera plants have a relatively shallow root system, so providing them with ample room for their roots to grow is essential. When the roots have enough space to spread out, they can absorb water and nutrients more efficiently, leading to better overall health for the plant.
Better drainage is another advantage of transplanting your aloe vera plant. Aloe vera plants prefer well-draining soil and can suffer from root rot if their roots sit in waterlogged soil for extended periods. By transplanting the plant into a pot with proper drainage holes, you ensure that excess water can easily escape, preventing the roots from becoming waterlogged and potentially rotting.
Lastly, transplanting your aloe vera plant can enhance its aesthetic appeal. Aloe vera plants are often grown for their attractive foliage and unique shape. By choosing a new pot that complements the plant’s appearance, you can create a visually pleasing display that adds beauty to any indoor or outdoor space.
When to Transplant Your Aloe Vera Plant
Knowing when to transplant your aloe vera plant is crucial for its successful transition to a new pot. There are several signs that indicate your plant may need to be transplanted. One of the most obvious signs is when the roots start to become visibly crowded and begin to grow out of the drainage holes at the bottom of the pot. This indicates that the plant has outgrown its current container and needs more space for its roots to grow.
Another sign that your aloe vera plant needs to be transplanted is when it starts to show signs of stunted growth or wilting, despite regular watering and adequate sunlight. This could be an indication that the roots are not able to absorb enough water and nutrients due to overcrowding in the current pot.
The best time of year to transplant your aloe vera plant is during the spring or early summer when the plant is actively growing. This allows it to recover more quickly from the transplant shock and establish itself in its new pot before the colder months arrive. Avoid transplanting during the winter or late fall when the plant is in a dormant state, as it may not have enough energy to recover from the stress of transplantation.
Choosing the Right Pot for Your Aloe Vera Plant
| Pot Material | Pros | Cons |
|---|---|---|
| Terra Cotta | Allows for air circulation and drainage | Can dry out quickly and may crack in freezing temperatures |
| Plastic | Lightweight and durable | May not allow for proper drainage and can retain moisture |
| Ceramic | Comes in a variety of colors and designs | Can be heavy and may not allow for proper drainage |
| Concrete | Durable and heavy, making it difficult for pets to knock over | May not allow for proper drainage and can be difficult to move |
Choosing the right pot for your aloe vera plant is essential for its health and growth. There are several factors to consider when selecting a pot, including size and material.
The size of the pot is crucial for providing enough room for the plant’s roots to grow. A general rule of thumb is to choose a pot that is one to two inches larger in diameter than the current pot. This allows for adequate root space without overwhelming the plant. However, avoid choosing a pot that is too large, as this can lead to waterlogged soil and root rot.
The material of the pot is also important. Aloe vera plants prefer pots made of porous materials, such as terracotta or clay, as they allow for better airflow and water drainage. These materials also help to prevent overwatering by allowing excess moisture to evaporate through the sides of the pot. Avoid using plastic pots, as they tend to retain moisture and can lead to root rot if not properly drained.
Drainage holes are another crucial consideration when choosing a pot for your aloe vera plant. Ensure that the pot has several drainage holes at the bottom to allow excess water to escape. This helps prevent water from pooling at the bottom of the pot and causing root rot. If the pot you choose does not have drainage holes, you can drill them yourself using a drill with a masonry bit.
Preparing Your Aloe Vera Plant for Transplanting
Before transplanting your aloe vera plant, it is essential to prepare it properly to ensure a successful transition. This involves following a few steps, including adjusting the watering schedule, pruning dead leaves, and removing any pests or diseases.
Adjusting the watering schedule is crucial in preparing your aloe vera plant for transplanting. About a week before transplanting, reduce the frequency of watering to allow the soil to dry out slightly. This helps prevent excessive moisture in the soil during transplantation, which can lead to root rot. However, do not let the soil become bone dry, as this can stress the plant. Aim for a balance where the soil is slightly dry but still retains some moisture.
Pruning dead leaves is another important step in preparing your aloe vera plant for transplanting. Remove any yellow or brown leaves from the plant, as these are signs of dying or dead foliage. Pruning helps improve the overall appearance of the plant and allows it to focus its energy on new growth after transplantation.
Inspect your aloe vera plant for any pests or diseases before transplanting. Common pests that can affect aloe vera plants include mealybugs and spider mites. If you notice any signs of infestation, such as webbing or small insects, treat the plant with an appropriate insecticide or insecticidal soap to eliminate the pests. Additionally, check for any signs of diseases, such as rot or fungal infections, and address them before transplanting to prevent further spread.
How to Remove Your Aloe Vera Plant from Its Current Pot
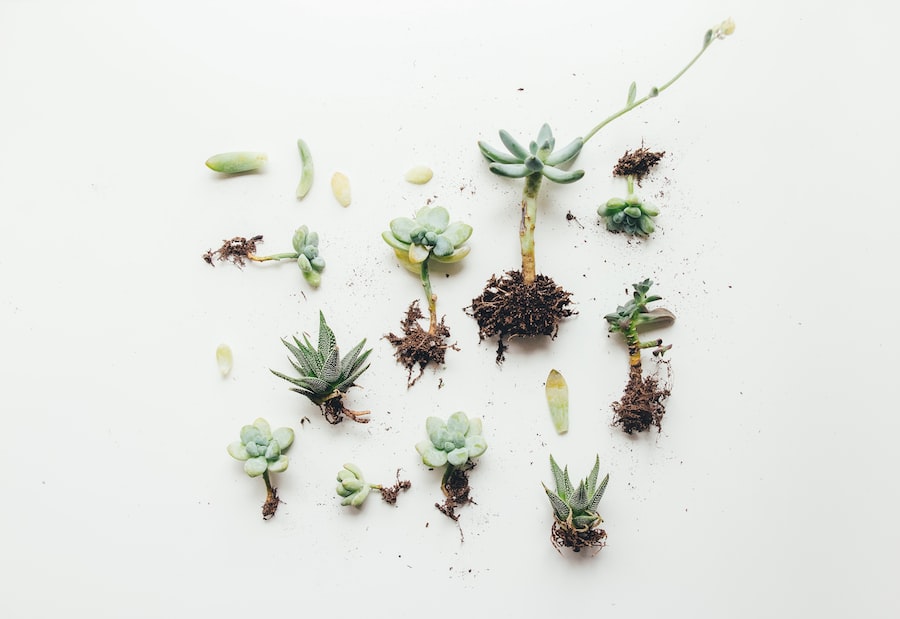
Removing your aloe vera plant from its current pot requires careful handling to avoid damaging the roots or foliage. Follow these step-by-step instructions for safely removing the plant:
1. Water the plant thoroughly a day or two before transplanting. This helps loosen the soil and makes it easier to remove the plant from the pot.
2. Prepare a clean workspace and gather all necessary tools, including gloves, a trowel or small shovel, and a clean towel or piece of burlap.
3. Carefully turn the pot upside down while supporting the base of the plant with one hand. Gently tap the sides of the pot to loosen the soil and roots.
4. Slowly slide the plant out of the pot, using your other hand to support the base of the plant and prevent it from falling.
5. If the plant is stuck in the pot, gently loosen the soil around the edges using a trowel or small shovel. Be careful not to damage the roots.
6. Once the plant is free from the pot, gently shake off any excess soil from the roots. If the roots are tightly packed, you can use your fingers to carefully loosen them.
7. Place the plant on a clean towel or piece of burlap to prevent soil from spilling onto your workspace.
Preparing the Soil for Your Aloe Vera Plant
Preparing the soil for your aloe vera plant is crucial for its successful transplantation. Aloe vera plants prefer well-draining soil that allows excess water to escape easily. Here are some considerations when preparing the soil:
Soil type and composition: Aloe vera plants thrive in a well-draining soil mix that is slightly acidic to neutral. A recommended soil mix for aloe vera plants is a combination of potting soil, perlite, and sand. This mixture provides good drainage while retaining enough moisture for the plant’s roots.
Adding fertilizer or other amendments: Before transplanting your aloe vera plant, you can add some organic matter or slow-release fertilizer to the soil to provide additional nutrients. However, be cautious not to over-fertilize, as this can lead to root burn or nutrient toxicity. Follow the instructions on the fertilizer packaging for proper application rates.
Transplanting Your Aloe Vera Plant into Its New Pot
Transplanting your aloe vera plant into its new pot requires careful handling to avoid damaging the roots or foliage. Follow these step-by-step instructions for safely transplanting the plant:
1. Select a clean pot that is one to two inches larger in diameter than the current pot and has drainage holes at the bottom.
2. Fill the new pot with a well-draining soil mix, leaving enough space at the top for the plant’s base.
3. Create a small hole in the center of the soil using your fingers or a trowel.
4. Gently place the aloe vera plant into the hole, ensuring that the base of the plant is level with the top of the pot.
5. Fill in the gaps around the plant with additional soil, gently pressing it down to secure the plant in place.
6. Water the plant thoroughly, allowing excess water to drain out through the drainage holes.
Watering Your Aloe Vera Plant After Transplanting
Proper watering techniques are crucial for the health and survival of your aloe vera plant after transplanting. Here are some guidelines to follow:
Water your aloe vera plant immediately after transplanting to help settle the soil and remove any air pockets around the roots. Thoroughly saturate the soil until water starts to drain out through the bottom of the pot.
After the initial watering, allow the soil to dry out slightly before watering again. Aloe vera plants prefer slightly dry conditions and can suffer from root rot if overwatered. Aim to water your plant when the top inch of soil feels dry to the touch.
When watering, ensure that excess water drains out through the drainage holes at the bottom of the pot. Avoid letting your aloe vera plant sit in standing water, as this can lead to root rot.
Caring for Your Aloe Vera Plant After Transplanting
Caring for your aloe vera plant after transplanting involves providing it with proper sunlight, temperature, fertilizing, pruning, and maintenance. Here are some guidelines to follow:
Sunlight and temperature requirements: Aloe vera plants thrive in bright, indirect sunlight. Place your plant near a window that receives ample sunlight throughout the day. However, avoid placing it in direct sunlight, as this can cause sunburn on its leaves. Aloe vera plants prefer temperatures between 55°F and 80°F (13°C and 27°C) and can tolerate slightly cooler temperatures during winter dormancy.
Fertilizing schedule: Aloe vera plants are relatively low-maintenance and do not require frequent fertilizing. Apply a balanced, water-soluble fertilizer once every two to three months during the growing season (spring and summer). Follow the instructions on the fertilizer packaging for proper application rates.
Pruning and maintenance: Remove any dead or yellow leaves from your aloe vera plant regularly to maintain its appearance and overall health. Use clean, sharp scissors or pruning shears to make clean cuts near the base of the leaf. Avoid tearing or ripping the leaves, as this can damage the plant.
Troubleshooting Common Issues with Transplanting Aloe Vera Plants
Transplanting aloe vera plants can sometimes lead to common issues that need to be addressed promptly. Here are some troubleshooting tips for common problems:
Overwatering: Overwatering is a common issue that can lead to root rot in aloe vera plants. If you notice that the leaves are turning yellow or brown and feel mushy to the touch, it is a sign of overwatering. To remedy this, reduce the frequency of watering and allow the soil to dry out before watering again. Ensure that excess water drains out through the drainage holes at the bottom of the pot.
Underwatering: Underwatering can cause aloe vera plants to become dehydrated and wilted. If you notice that the leaves are drooping and feel dry to the touch, it is a sign of underwatering. To remedy this, increase the frequency of watering and ensure that the soil is thoroughly saturated during each watering session.
Root rot: Root rot can occur if your aloe vera plant is consistently exposed to waterlogged soil. Signs of root rot include blackened or mushy roots, foul odor, and wilting foliage. To address root rot, remove the affected parts of the plant and repot it in fresh, well-draining soil. Adjust your watering schedule to prevent future occurrences.
Pests and diseases: Aloe vera plants can be susceptible to pests such as mealybugs and spider mites. If you notice signs of infestation, such as webbing or small insects, treat the plant with an appropriate insecticide or insecticidal soap. Additionally, monitor your plant for any signs of diseases, such as rot or fungal infections, and address them promptly to prevent further spread.
Transplanting your aloe vera plant can have numerous benefits for its growth, health, and aesthetic appeal. By providing the plant with increased root space, better drainage, and a visually pleasing pot, you can enhance its overall well-being. Knowing when to transplant your aloe vera plant, choosing the right pot and soil, preparing the plant for transplanting, and following proper watering and care techniques are essential for a successful transplantation process. By following these guidelines and troubleshooting common issues that may arise, you can ensure that your aloe vera plant thrives in its new pot and continues to provide you with its many health benefits for years to come.
If you’re looking for a comprehensive guide on how to transplant an aloe vera plant, look no further! Lawn World has an informative article that provides step-by-step instructions and helpful tips for successfully moving your aloe vera plant to a new location. Whether you’re a beginner or an experienced gardener, this article will ensure that your aloe vera plant thrives in its new home. Check out the article here for all the details you need to know.
FAQs
What is aloe vera?
Aloe vera is a succulent plant species that is widely cultivated for its medicinal and ornamental purposes. It is known for its fleshy leaves that contain a gel-like substance with various health benefits.
When is the best time to transplant aloe vera?
The best time to transplant aloe vera is during the spring or summer when the plant is actively growing. Avoid transplanting during the winter or fall when the plant is dormant.
What are the steps to transplant aloe vera?
The steps to transplant aloe vera include selecting a new pot, preparing the soil, removing the plant from its current pot, trimming the roots, placing the plant in the new pot, and watering it thoroughly.
What kind of soil is best for aloe vera?
Aloe vera prefers well-draining soil that is slightly acidic with a pH level between 6.0 and 7.0. A mixture of sand, perlite, and peat moss is ideal for aloe vera.
How often should I water my newly transplanted aloe vera?
After transplanting, water your aloe vera thoroughly and then wait for the soil to dry out completely before watering again. Aloe vera prefers infrequent watering, so avoid overwatering as it can lead to root rot.
How long does it take for a transplanted aloe vera to recover?
It usually takes a transplanted aloe vera about two to four weeks to recover from the transplant shock and start growing again. During this time, avoid exposing the plant to direct sunlight and water it sparingly.


