
Growing a Tree from a Cherry Pit: A Beginner’s Guide
Imagine adding a vibrant touch to your backyard by growing your own cherry tree. Yes, this is very much possible, and what’s more, the process starts right with the delicious cherry fruit you just enjoyed. This essay provides in-depth information about how to grow your own cherry tree, starting from its pit. Firstly, we delve into the crucial preparation of the cherry pit. This involves meticulously removing the pit from the cherry, cleansing it, and preparing it for germination. This process includes ‘stratification’, allowing the pit to undergo conditions similar to a natural winter environment to promote growth. Secondly, we discuss the appropriate way to plant the cherry pit. Factors to consider for optimal growth include location, planting depth, and soil conditions. Finally, we tackle how to provide the best care for the growing cherry plant, ensuring it flourishes beautifully into a full-grown tree by maintaining the right watering, lighting, and feeding process.
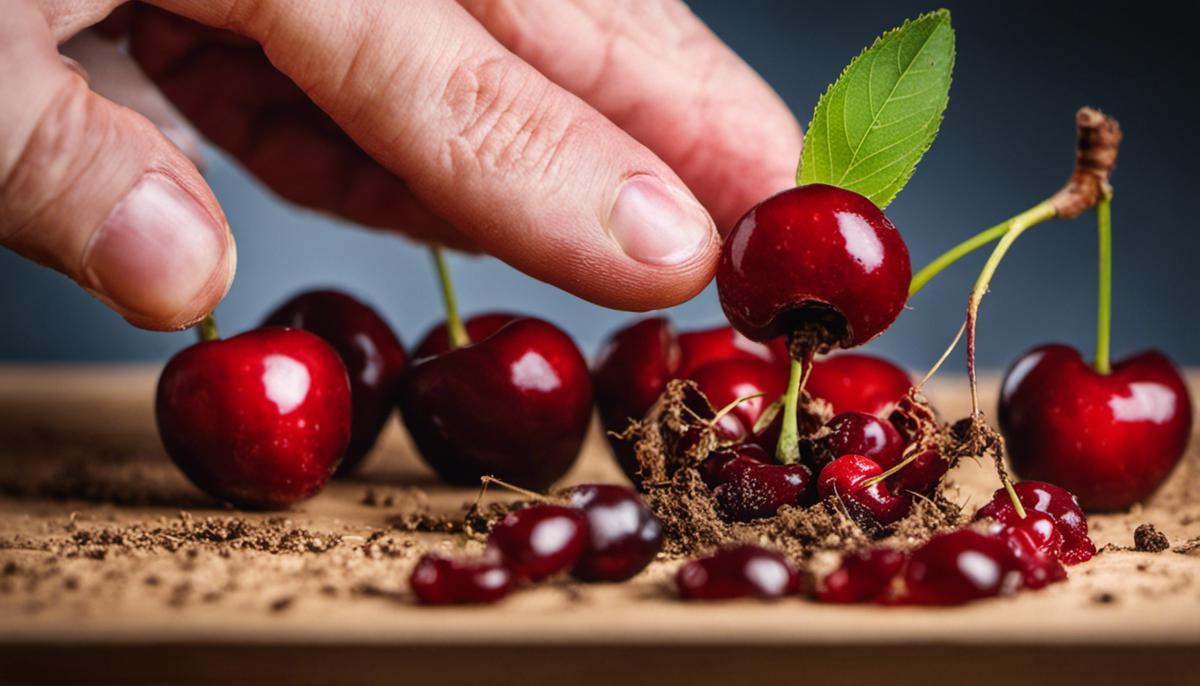
Preparation of Cherry Pit
Prime Your Cherry Pits for Planting – A Step-by-Step Guide
If you’ve ever bitten into a juicy cherry and paused at the hard pit, chances are you’ve wondered about the potential life contained within that tiny stone. Don’t toss it out – it can be transformed into a beautiful cherry tree! Here’s a beginner-friendly guide on how to get your cherry pits ready for planting and fostering future fruit-bearing trees.
- Collect the Cherry Pits
Next time you feast on cherries, remember to save the pits. Aim for a handful, as not all may successfully germinate. Cherry pits need to be fresh, thus, picking them directly from the fruit is the surest way of locking in that freshness.
- Clean the Pits
Once you’ve collected enough cherry pits, the next step is cleaning them off thoroughly. Rinse under warm water and make use of a soft brush, such as a toothbrush, to scrub away any remaining fruit.
- Soak the Cleaned Pits
Now, submerge the clean pits in a bowl of warm water, and let them soak overnight. This softens the hard outer shell, making it eventually easier for the sprout inside to break through.
- Stratification Process
This stage can be aptly named as the stone fruit’s winter simulation. Cherry pits require a cooling period before they can germinate, a phase called stratification.
- Prepare a Ziploc Bag
Line a Ziploc bag with a damp paper towel. It offers the perfect environment for the pits to stratify. The moisture helps initiate the germination process, while the bag protects the pits from external elements.
- Place the Pits in the Bag
After their overnight soaking, take the pits and place them single-layered onto the damp paper towel. Then, seal the bag tightly. Ensure all pits have contact with the dampness; this imitates the cold, wet ground of winter that cherry trees naturally endure in the wild.
- Refrigerate for Stratification
Now, place the prepared Ziploc bag in the refrigerator. The optimal temperature for stratification is between 33°F and 41°F. The pits undergo a dormancy period, triggering them into ‘spring mode’ that primes them for growth.
- Check Regularly
Throughout the stratification period of about 10-12 weeks, it’s vital to regularly check the pits. Ensure the paper towel remains damp, not soaking, and watch out for any signs of mold.
- Plant the Stratified Pits
After this cooling period and once you notice a small sprout emerging from some of your pits, it means they’re ready for the ground. Plant them in rich, well-drained soil, making sure the sprouted end faces upward. Keep the soil evenly moist and be patient. Soon, you’ll witness the birth of your own cherry tree from a humble pit.
There you have it, the fascination of seed germination. It’s remarkable how one tiny cherry pit can hold all it needs within itself to grow into a towering, fruit-providing tree. The process may be slow, but when you finally pluck your self-grown cherry from your own tree, you’ll realize it was worth it. Now, what are you waiting for? Start saving those pits and get your hands dirty! Whether you do it out of curiosity or to strengthen your connection with nature, this surely is a satisfying endeavor. Happy gardening!

Planting the Cherry Pit
Post-Stratification: Let’s Get Planting!
Alright, green thumbs, the journey so far has been rewarding, hasn’t it? After collecting and cleaning the cherry pits, soaking them just right, and successfully managing the stratification process in the refrigerator, the excitement is real. These beauties are now ready for the final stage – getting their hands (or rather, roots) dirty!
Look for a pot that is at least ten inches in depth. The cherry pit will need the space to grow and establish its root system. Make sure that your chosen pot has multiple drainage holes. Cherries like moist, but not waterlogged conditions. Now, let’s fill that pot with a high-quality seed compost. The lighter and fluffier, the better. Add a little sand for those cherries who prefer a touch of grit in their living conditions.
Dig a hole about two inches deep and snuggle the pit into its new home. There’s a common misconception that cherry pits need to be planted pointy side up. Not true! The pit can send up its shoot and down its roots from any position.
Cover the pit with compost, tap it down gently, and then water well. Cherries love sunlight and warmth. The ideal spot for this blooming cherry is a sunny windowsill or if outside, in full sun but out of gusty winds.
Now, comes the waiting. Cherry pits are not the fastest germinators, so patience is key. But this is part of the joy of growing from seed – you never quite know when that tiny shoot will emerge, making each day a little bit exciting.
Caring for a cherry tree is an enriching process that takes us back to our roots, literally. Make sure to water the plant regularly but don’t overwater – those roots shouldn’t sit in water. Remember to turn your pot once a week so that the plant receives equal light on all sides.
As the tiny tree grows, continue to nurture it, protect it from pests, and keep it in the right conditions. Over time, when the first cherry blossoms appear, and then the first fruits, a rewarding sense of accomplishment will follow.
This is the incredible world of growing cherries from pits. It’s a process steeped in patience, nurturing, and the sheer thrill of seeing life blossom from a tiny pit. It is more than just a hobby. It is living in sync with Mother Nature, understanding her ways, and reaping the delicious rewards of it. Cherries on your cherry tree? What could be more satisfying and wonderful? Enjoy the process, and most importantly, keep those green thumbs busy!
Caring for the Cherry Plant
Now that you’ve learned the meticulous task of preparing and planting your cherry pits, let’s move on to the delightful endeavor that follows: caring for a budding cherry tree.
First off, we need to talk about sunlight. Sunlight is essential for photosynthesis and your cherry tree’s overall growth. Young saplings need six to eight hours of direct sunlight daily to flourish, hence choose a location in your home or yard accordingly. Mirroring nature, early morning sun exposure is most beneficial.
Watering is equally critical, as too much or too little can be detrimental to your cherry tree. Keeping this in mind, it’s essential to maintain a careful balance; the soil should be consistently moist but not waterlogged. If you have planted your tree in a pot, make sure there’s an effective drainage system in place to remove excess water.
The next important aspect involves a comprehensive understanding of fertilizing necessity. Cherry trees are known to be quite self sufficient and don’t typically require additional fertilization. However, if your tree isn’t growing at the expected rate or its leaves showcase a yellowish tint, it might be an indication that your tree may need some added nutrients. A slow-release granular fertilizer with an equal ratio of Nitrogen, Phosphorus and Potassium (N-P-K) can be beneficial in such situations.
Budding cherry trees also require regular pruning to ensure their health and to aid the growth process. Pruning is typically done in the late winter or early spring, before the tree starts to bud. By removing dead branches and overcrowded growth areas, you allow more sunlight and air to reach the inner branches, and hence promising a healthier tree.
While your cherry tree is still budding, it’s vital to be on a vigilant lookout for pests. Cherry tree worms, aphids, fruit flies, and borers can cause substantial damage. To ward off these pests, introduce natural predators like birds and predatory insects or use organic pesticides.
And now, the most rewarding part: waiting for the cherry blossoms. After all the tender care and attention, seeing the first blossoms will be a moment of joy unparalleled. Cherry trees typically take three to four years to start blooming, so you’d have to practice a little patience. Once it does bloom, though, the tree will invite a symphony of pollinators, elevating the biodiversity around your home.
Growing your cherry tree from a pit is a fulfilling journey. Every step, every task underscores your strong bond with the rhythms of nature. And the reward? A cluster of cherries and a beautiful, fragrant tree. You’ve got nothing to lose but everything to gain. Embrace the challenge, and enjoy every moment. This is what makes the labor worth it.
Here’s to some fruitful gardening and may the fruits of your labor be as sweet as the cherries soon to decorate your tree!

It’s wonderful to realize that we can actually nurture and grow these beautiful cherry trees right in our own backyards. Starting with a little pit from a cherry, understanding the importance of the stratification process, planning out the planting depth, location, and optimal soil conditions for the budding tree, and eventually nurturing it with adequate watering, lighting and nutrients, our endeavors can create an environment where a small cherry pit transforms into a thriving tree. This not only adds a breath of freshness to our space, but also teaches us a lot about nature’s miraculous ways. So why wait? Let’s begin this fascinating journey – it’s time to plant and cultivate your own cherry tree!


