
Growing Your Own Hibiscus: A Step-by-Step Guide to Propagating from Cuttings

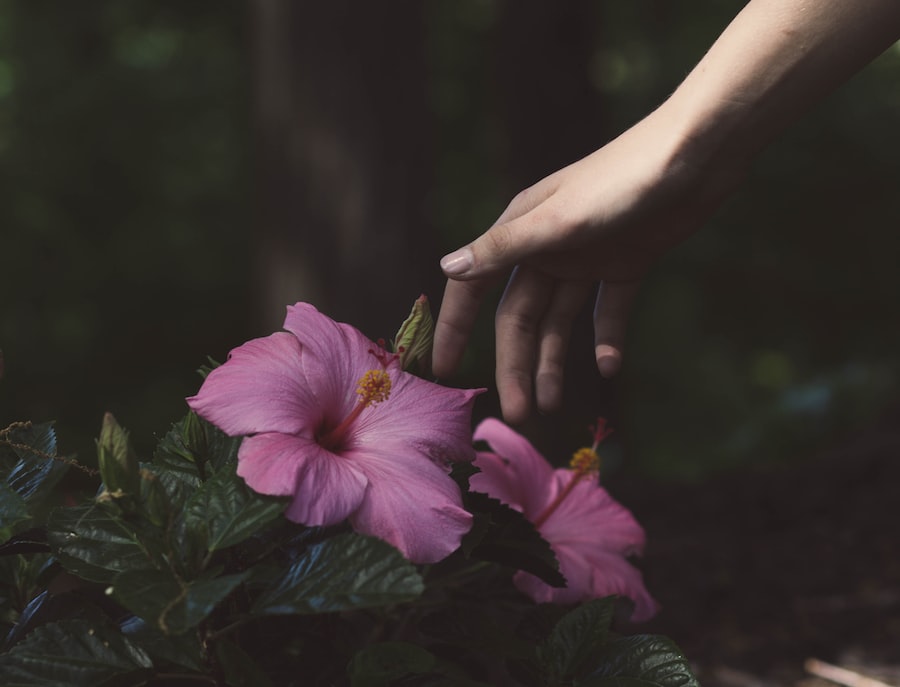
Hibiscus plants are known for their vibrant and beautiful flowers, making them a popular choice for gardens and landscapes. While you can purchase hibiscus plants from nurseries, propagating them yourself can be a rewarding and cost-effective way to expand your collection. Propagation refers to the process of creating new plants from existing ones, and there are several methods that can be used to propagate hibiscus plants. In this article, we will explore the basics of hibiscus propagation, including the different methods, the best time to propagate, and the tools needed for successful propagation.
Propagating hibiscus plants is important for several reasons. Firstly, it allows you to create new plants without having to purchase them, saving you money in the long run. Additionally, propagating your own hibiscus plants gives you control over the quality and health of the plants. By selecting healthy parent plants and using proper propagation techniques, you can ensure that your new plants will thrive. Finally, propagating hibiscus plants allows you to expand your collection and share your love for these beautiful flowers with others.
Key Takeaways
- Hibiscus propagation involves taking cuttings from a healthy plant and rooting them to create new plants.
- The best time to propagate hibiscus is in the spring or early summer, using clean and sharp tools.
- Cuttings should be prepared by removing lower leaves and making a clean cut at a 45-degree angle.
- Hibiscus cuttings should be planted in well-draining soil and pots with good drainage holes.
- Watering and fertilizing should be done regularly, while monitoring for pests and diseases and transferring to larger pots or garden beds as needed.
Understanding the Basics of Hibiscus Propagation
There are several methods that can be used to propagate hibiscus plants, including stem cuttings, layering, and seed propagation. Each method has its own advantages and disadvantages, so it’s important to understand them before deciding which one to use.
Stem cuttings are one of the most common methods of propagating hibiscus plants. This involves taking a cutting from a healthy parent plant and rooting it in soil or water until it develops its own roots. Stem cuttings are relatively easy to do and have a high success rate. Layering is another method that involves bending a low-growing branch of a parent plant and burying it in soil until it develops roots. This method is useful for plants that have long, flexible branches that can be easily bent and buried.
Seed propagation is another option for propagating hibiscus plants, but it is less commonly used. This method involves collecting seeds from mature hibiscus flowers and planting them in soil. While seed propagation can be successful, it is a slower process and requires more patience compared to stem cuttings or layering.
Before propagating hibiscus plants, there are several factors to consider. Firstly, you should ensure that the parent plant is healthy and free from pests or diseases. This will help ensure that the new plants will also be healthy. Additionally, you should choose the right method of propagation based on your preferences and the resources available to you. Stem cuttings are a popular choice due to their ease and high success rate, but layering and seed propagation can also be successful if done correctly.
Selecting the Right Time and Tools for Propagation
The timing of hibiscus propagation is crucial for success. The best time to propagate hibiscus plants is during the spring or early summer when the plants are actively growing. This is when the plants have the highest chance of successfully rooting and establishing themselves. It’s important to avoid propagating hibiscus plants during periods of extreme heat or cold, as this can stress the plants and reduce their chances of survival.
In addition to timing, having the right tools is essential for successful hibiscus propagation. Some basic tools you will need include sharp pruning shears or scissors for taking cuttings, a clean container or pot for rooting the cuttings, and a well-draining soil mix for planting the cuttings. It’s important to use clean tools to prevent the spread of diseases or pests. Additionally, using a well-draining soil mix will help prevent root rot and other issues that can arise from overwatering.
When using tools for hibiscus propagation, it’s important to use them safely and effectively. Make sure your tools are sharp and clean to ensure clean cuts and minimize damage to the parent plant. When taking cuttings, make sure to cut just below a node, which is where the leaves attach to the stem. This will increase the chances of successful rooting. When planting the cuttings, make sure to create a hole in the soil mix that is deep enough to accommodate the cutting without damaging it. Gently firm the soil around the cutting to ensure good contact between the cutting and the soil.
Preparing the Cuttings for Planting
| Task | Time Required | Tools Needed | Materials Needed |
|---|---|---|---|
| Cutting Collection | 30 minutes | Gloves, Pruning Shears | Bucket, Water, Rooting Hormone Powder |
| Cutting Preparation | 20 minutes | Pruning Shears, Scissors | Clean Water, Rooting Hormone Powder |
| Planting Cuttings | 30 minutes | Shovel, Trowel | Potting Soil, Pots, Water |
| Care and Maintenance | Varies | Watering Can, Fertilizer | Water, Fertilizer |
When propagating hibiscus plants through stem cuttings, it’s important to select healthy cuttings for the best chance of success. Look for stems that are healthy and free from pests or diseases. Avoid using stems that are wilted or damaged, as they are less likely to root successfully. Additionally, choose stems that are semi-hardwood or hardwood, as these have a higher chance of rooting compared to softwood stems.
Before planting the cuttings, it’s important to prepare them properly. Start by removing any leaves from the lower half of the cutting, as these can rot when planted in soil. Leave a few leaves at the top of the cutting to provide energy for root development. If the cutting is long, you can also trim it down to a more manageable size.
To improve the chances of successful rooting, you can also apply a rooting hormone to the cut end of the stem. Rooting hormones contain plant hormones that stimulate root growth and can increase the chances of successful rooting. Simply dip the cut end of the stem into the rooting hormone powder or gel before planting it in soil.
When preparing cuttings for planting, it’s important to avoid common mistakes that can hinder their chances of success. One common mistake is using dull or dirty tools, which can lead to jagged cuts and increase the risk of disease transmission. Make sure to clean and sharpen your tools before using them for propagation. Another mistake is planting the cuttings too deep or too shallow in the soil. The cutting should be planted at a depth that allows the top leaves to be above the soil surface, while the bottom nodes are buried in the soil. This will provide the best conditions for root development.
Choosing the Right Soil and Pot for Your Hibiscus Cuttings
The choice of soil and pot is crucial for the successful growth of hibiscus cuttings. Hibiscus plants prefer well-draining soil that is rich in organic matter. This type of soil allows excess water to drain away, preventing root rot and other issues that can arise from overwatering. Additionally, organic matter helps improve soil fertility and provides essential nutrients for plant growth.
When selecting a pot for your hibiscus cuttings, choose one that is the right size for the number of cuttings you have. The pot should have drainage holes at the bottom to allow excess water to escape. Avoid using pots that are too large, as this can lead to overwatering and root rot. It’s also important to choose a pot made of a material that is suitable for hibiscus plants. Plastic pots are a popular choice as they are lightweight, durable, and retain moisture well.
When planting your hibiscus cuttings, make sure to fill the pot with well-draining soil mix. You can create your own soil mix by combining equal parts of potting soil, perlite or vermiculite, and organic matter such as compost or peat moss. This will provide a balanced mix that retains moisture while allowing excess water to drain away.
Planting and Caring for Your Hibiscus Cuttings
Once you have prepared your hibiscus cuttings and selected the right soil and pot, it’s time to plant them. Follow these step-by-step instructions for successful planting:
1. Fill the pot with well-draining soil mix, leaving about an inch of space at the top.
2. Make a hole in the soil mix that is deep enough to accommodate the cutting without damaging it.
3. Gently place the cutting into the hole, making sure that the bottom nodes are buried in the soil and the top leaves are above the soil surface.
4. Gently firm the soil around the cutting to ensure good contact between the cutting and the soil.
5. Water the cutting thoroughly until water drains out of the bottom of the pot.
6. Place the pot in a warm and bright location, but away from direct sunlight.
7. Monitor the moisture level of the soil and water as needed to keep it evenly moist, but not waterlogged.
Caring for young hibiscus plants is essential for their healthy growth and development. Here are some essential care tips:
– Provide bright but indirect sunlight: Hibiscus plants thrive in bright light, but direct sunlight can scorch their leaves. Place your young hibiscus plants in a location that receives bright but indirect sunlight for at least six hours a day.
– Maintain proper humidity levels: Hibiscus plants prefer moderate to high humidity levels. You can increase humidity around your plants by placing a tray of water near them or using a humidifier.
– Water regularly: Hibiscus plants prefer evenly moist soil, so it’s important to water them regularly. Check the moisture level of the soil by sticking your finger about an inch into the soil. If it feels dry, it’s time to water. Avoid overwatering, as this can lead to root rot.
– Prune regularly: Regular pruning helps promote bushier growth and encourages more flower production. Prune your hibiscus plants in early spring before new growth begins. Remove any dead or damaged branches, as well as any branches that are crossing or rubbing against each other.
Watering and Fertilizing Your Hibiscus Cuttings
Proper watering and fertilizing are essential for the healthy growth of hibiscus plants. Here are some tips for watering and fertilizing your hibiscus cuttings:
– Watering: Hibiscus plants prefer evenly moist soil, so it’s important to water them regularly. Check the moisture level of the soil by sticking your finger about an inch into the soil. If it feels dry, it’s time to water. Water the plants thoroughly until water drains out of the bottom of the pot, then allow the soil to dry out slightly before watering again. Avoid overwatering, as this can lead to root rot.
– Fertilizing: Hibiscus plants are heavy feeders and require regular fertilization to thrive. Use a balanced fertilizer with a ratio of 10-10-10 or 20-20-20. Apply the fertilizer according to the instructions on the package, usually every two to four weeks during the growing season. Avoid overfertilizing, as this can lead to salt buildup in the soil and damage the roots.
– Organic fertilizers: If you prefer to use organic fertilizers, there are several options available. Compost or well-rotted manure can be applied as a top dressing around the base of the plants. You can also use organic liquid fertilizers such as fish emulsion or seaweed extract.
It’s important to note that hibiscus plants may require different watering and fertilizing routines depending on their specific needs and growing conditions. Monitor your plants closely and adjust your care routine as needed.
Managing Pests and Diseases in Your Hibiscus Plants
Like any other plant, hibiscus plants are susceptible to pests and diseases. Here are some common pests and diseases that can affect hibiscus plants:
– Aphids: These small, soft-bodied insects feed on the sap of hibiscus plants, causing stunted growth and distorted leaves. They can be controlled by spraying the plants with a strong stream of water or by using insecticidal soap.
– Whiteflies: These tiny, white insects feed on the undersides of hibiscus leaves, causing yellowing and wilting. They can be controlled by using yellow sticky traps or by applying insecticidal soap.
– Spider mites: These tiny pests feed on the sap of hibiscus plants, causing yellowing and stippling of the leaves. They can be controlled by spraying the plants with a strong stream of water or by using insecticidal soap.
– Leaf spot: This fungal disease causes dark spots to appear on the leaves of hibiscus plants. It can be controlled by removing and destroying infected leaves and improving air circulation around the plants.
– Root rot: This fungal disease is caused by overwatering or poorly draining soil. It causes the roots to rot, leading to wilting and death of the plant. To prevent root rot, make sure to use well-draining soil and avoid overwatering.
To prevent and treat pest and disease problems in your hibiscus plants, it’s important to monitor them regularly for any signs of trouble. Early detection and intervention can help prevent the spread of pests and diseases and minimize damage to your plants. If you notice any signs of pests or diseases, take appropriate action immediately to prevent further damage.
Monitoring Growth and Development of Your Hibiscus Cuttings
Monitoring the growth and development of your hibiscus cuttings is essential for their healthy growth. Here are some signs of healthy growth in hibiscus plants:
– New leaf growth: Healthy hibiscus plants will produce new leaves regularly. Look for new leaves emerging from the stem tips or nodes.
– Flower buds: As hibiscus plants mature, they will start producing flower buds. Look for small, round buds forming at the ends of the stems.
– Strong root development: Healthy hibiscus plants will develop a strong root system. Gently lift the plant out of its pot and check for white, healthy roots.
To monitor the growth and development of your hibiscus cuttings, keep a close eye on them and make note of any changes or abnormalities. Adjust your care routine as needed based on their growth patterns and needs.
Transferring Your Hibiscus Cuttings to Larger Pots or Garden Beds
As your hibiscus cuttings grow and develop, they will eventually outgrow their pots and need to be transferred to larger pots or garden beds. Here are some tips for successful transplantation:
– Timing: The best time to transfer hibiscus cuttings to larger pots or garden beds is during the spring or early summer when the plants are actively growing. This will give them the best chance of establishing themselves in their new environment.
– Transplanting technique: To transplant hibiscus cuttings, gently remove them from their current pots and place them in their new pots or garden beds. Make sure to dig a hole that is deep enough to accommodate the root ball without damaging it. Gently firm the soil around the plant to ensure good contact between the roots and the soil.
– Watering: Watering is an essential task in maintaining a healthy garden or landscape. It involves providing plants with the necessary amount of water to support their growth and development. The frequency and amount of watering required depend on various factors such as the type of plants, soil type, weather conditions, and stage of growth. It is important to water plants deeply and thoroughly, ensuring that the water reaches the root zone. Overwatering can lead to root rot and other diseases, while underwatering can cause wilting and stunted growth. Proper watering techniques, such as using a soaker hose or drip irrigation system, can help conserve water and promote efficient absorption by the plants. Regular monitoring of soil moisture levels and adjusting watering schedules accordingly is crucial for maintaining optimal plant health.


