
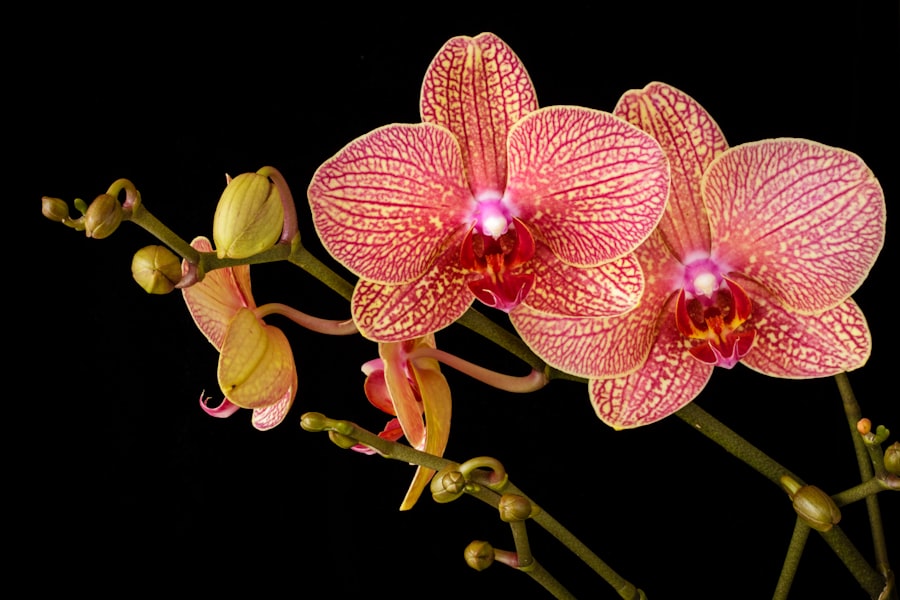
Indoor Orchid Care: Post-Bloom Tips

Indoor orchids are a popular choice for plant enthusiasts due to their stunning flowers and unique beauty. However, caring for orchids can be a bit challenging, especially when it comes to post-bloom care. After an orchid has finished blooming, it requires special attention to ensure its health and future blooms. In this article, we will explore the importance of post-bloom care for orchids and provide tips on how to properly care for your orchid after it has finished blooming.
Key Takeaways
- Post-bloom care is crucial for the health and longevity of indoor orchids.
- Understanding the lifecycle of orchids can help you provide the right care at the right time.
- Proper watering and fertilizing are key components of post-bloom care for orchids.
- Pruning and repotting can also be necessary after blooming to maintain healthy growth.
- Avoiding common mistakes and troubleshooting issues can ensure successful post-bloom orchid care.
Understanding the Lifecycle of Orchids
To effectively care for your orchid after it has finished blooming, it is important to understand the different stages of its lifecycle. Orchids go through several stages, including growth, blooming, and dormancy. The blooming stage is the most visually appealing stage, as it is when the orchid produces its beautiful flowers. However, once the flowers have wilted and fallen off, the orchid enters the post-bloom stage.
Identifying when an orchid is in the post-bloom stage is crucial for providing the appropriate care. During this stage, the orchid will focus its energy on storing nutrients and developing new growth. The leaves may appear healthy and vibrant, but there will be no signs of new flower spikes. It is important to note that not all orchids bloom at the same time or for the same duration, so it is essential to observe your specific orchid’s behavior to determine when it has entered the post-bloom stage.
Importance of Post-Bloom Care for Orchids
Post-bloom care is crucial for the overall health and longevity of your orchid. Neglecting proper care during this stage can have detrimental effects on future blooms and even the survival of the plant. After blooming, an orchid needs time to recover and replenish its energy reserves before it can produce new flowers. By providing the necessary care during this stage, you are ensuring that your orchid has the best chance of thriving and producing beautiful blooms in the future.
One of the main reasons why post-bloom care is important is because it allows the orchid to store nutrients and energy for future growth. During the post-bloom stage, the orchid will divert its energy from producing flowers to developing new leaves and roots. By providing the right conditions and care, you are helping the orchid build up its strength and resources for future blooming cycles.
Neglecting post-bloom care can have negative consequences on the health of your orchid. Without proper care, the orchid may become weak and susceptible to diseases and pests. It may also struggle to produce new flower spikes or may not bloom at all in future cycles. By taking the time to provide post-bloom care, you are giving your orchid the best chance of thriving and producing beautiful blooms year after year.
Tips for Watering Orchids After Blooming
| Tip | Description |
|---|---|
| Watering Frequency | Water orchids once a week or when the top inch of soil is dry. |
| Watering Method | Water orchids thoroughly, allowing water to drain out of the bottom of the pot. |
| Water Temperature | Use room temperature water to avoid shocking the orchid’s roots. |
| Humidity | Orchids prefer high humidity, so consider using a humidifier or placing a tray of water near the plant. |
| Fertilizer | Use a balanced fertilizer every two weeks during the growing season. |
| Light | Provide bright, indirect light for orchids to thrive. |
Watering is an essential aspect of orchid care, and it becomes even more important after blooming. During the post-bloom stage, you need to adjust your watering frequency and amount to ensure that your orchid receives the right amount of moisture without being overwatered.
One important factor to consider when watering orchids after blooming is proper drainage. Orchids are epiphytes, which means they naturally grow on trees or rocks in their natural habitat. They have adapted to absorb water from rain or mist and then dry out quickly. To mimic these conditions, it is crucial to provide your orchid with a well-draining potting mix and a container with drainage holes. This will prevent water from sitting in the pot and causing root rot.
Another important aspect of watering orchids after blooming is maintaining proper humidity levels. Orchids thrive in environments with high humidity, as it helps them absorb moisture through their roots and leaves. To increase humidity around your orchid, you can place a tray filled with water and pebbles beneath the pot or use a humidifier. Misting the leaves of your orchid can also help increase humidity levels.
When it comes to watering frequency, it is important to let the potting mix dry out slightly between waterings. Stick your finger about an inch into the potting mix, and if it feels dry, it is time to water your orchid. However, be careful not to let the potting mix completely dry out, as this can cause stress to the orchid. Finding the right balance is key to successful post-bloom care for your orchid.
Fertilizing Orchids After Blooming
Fertilizing is another important aspect of post-bloom care for orchids. During the post-bloom stage, your orchid will need additional nutrients to replenish its energy reserves and support new growth. However, it is important to choose the right type of fertilizer and apply it in the correct amounts to avoid damaging your orchid.
When selecting a fertilizer for your orchid, it is best to choose a balanced formula specifically formulated for orchids. These fertilizers typically have equal amounts of nitrogen (N), phosphorus (P), and potassium (K), as well as other essential micronutrients. Avoid using general-purpose fertilizers or those high in nitrogen, as they can promote excessive leaf growth at the expense of flower production.
The frequency of fertilizing your orchid will depend on the specific fertilizer you are using. Some fertilizers are designed to be applied every time you water your orchid, while others may recommend a weekly or monthly application. It is important to follow the instructions provided by the manufacturer to ensure that you are providing the right amount of nutrients without over-fertilizing.
When applying fertilizer, it is important to dilute it to half or quarter strength to avoid burning the roots of your orchid. This can be done by mixing the recommended amount of fertilizer with water according to the instructions on the label. Apply the diluted fertilizer to the potting mix, taking care to avoid getting any on the leaves or flowers of your orchid.
How to Prune Orchids After Blooming
Pruning is an important aspect of post-bloom care for orchids. It helps promote new growth, maintain the overall health of the plant, and prepare it for future blooming cycles. Pruning also allows you to remove any dead or damaged parts of the orchid, preventing the spread of diseases or pests.
To prune an orchid after blooming, start by inspecting the plant for any dead or yellowing leaves or stems. Using clean and sharp pruning shears or scissors, carefully remove these parts by cutting them as close to the base as possible. Be sure to disinfect your pruning tools before and after each use to prevent the spread of diseases.
If your orchid has finished blooming but still has a healthy flower spike, you can choose to leave it on the plant or remove it. Leaving the flower spike on can help promote new growth and potentially lead to another round of blooms in the future. However, if you prefer a neater appearance or if the flower spike is starting to turn brown or wilt, you can carefully cut it off just above a node.
It is important to note that not all orchids require pruning after blooming. Some orchids, such as Phalaenopsis, have a naturally arching growth habit and will continue to produce new flowers on the same spike for several years. In these cases, it is best to leave the spike intact and only remove it once it has turned brown and dried out completely.
Repotting Orchids After Blooming
Repotting is an important aspect of orchid care and should be considered after the orchid has finished blooming. Repotting allows you to refresh the potting mix, inspect the roots, and provide your orchid with fresh nutrients and growing conditions. However, it is important to know when and how to repot your orchid to avoid causing stress or damage.
One of the signs that your orchid needs to be repotted is if the potting mix has broken down or become compacted. Over time, the potting mix can break down and lose its ability to provide proper drainage and aeration for the roots. If you notice that the potting mix is retaining too much moisture or has become dense and compacted, it is time to repot your orchid.
Another sign that your orchid needs to be repotted is if it has outgrown its current container. Orchids prefer to be slightly root-bound, but if you notice that the roots are tightly packed and there is no room for growth, it is time to repot. Additionally, if you see that the roots are growing out of the drainage holes or wrapping around the base of the plant, it is a clear indication that your orchid needs a larger pot.
When repotting your orchid, start by carefully removing it from its current container. Gently loosen the roots and remove any old potting mix or dead roots. Inspect the roots for any signs of rot or disease, and trim them as necessary using clean and sharp pruning shears. Select a new pot that is slightly larger than the current one, ensuring that it has drainage holes. Fill the new pot with fresh orchid potting mix, place the orchid in the center, and gently pack the mix around the roots. Water the orchid lightly after repotting to help settle the potting mix.
Common Mistakes to Avoid in Post-Bloom Orchid Care
While post-bloom care is crucial for the health of your orchid, there are some common mistakes that many orchid owners make. These mistakes can have negative consequences on the overall health and future blooming of your orchid. By being aware of these mistakes and taking steps to avoid them, you can ensure the success of your post-bloom care routine.
One common mistake in post-bloom orchid care is overwatering. Many orchid owners tend to water their plants too frequently or in excessive amounts, thinking that it will promote growth and blooming. However, overwatering can lead to root rot and other fungal diseases, which can be detrimental to the health of your orchid. It is important to let the potting mix dry out slightly between waterings and to provide proper drainage to prevent water from sitting in the pot.
Another common mistake is neglecting proper lighting conditions. Orchids require bright but indirect light to thrive. Placing your orchid in direct sunlight can cause the leaves to burn, while placing it in a dark corner can prevent it from receiving enough light for photosynthesis. It is important to find a balance and provide your orchid with the right amount of light for its specific needs.
Neglecting fertilization is another common mistake in post-bloom orchid care. After blooming, your orchid will need additional nutrients to replenish its energy reserves and support new growth. Failing to fertilize your orchid can result in weak and stunted growth, as well as a lack of future blooms. It is important to choose a balanced fertilizer specifically formulated for orchids and apply it according to the instructions provided.
Troubleshooting Common Issues in Post-Bloom Orchid Care
During post-bloom care, you may encounter some common issues that can affect the health and future blooming of your orchid. By being aware of these issues and knowing how to address them, you can ensure the success of your post-bloom care routine.
One common issue is the development of yellow or drooping leaves. This can be a sign of overwatering, underwatering, or improper lighting conditions. To address this issue, check the moisture level of the potting mix and adjust your watering frequency accordingly. Ensure that your orchid is receiving the right amount of light for its specific needs, and make any necessary adjustments to its placement.
Another common issue is the development of pests, such as aphids or mealybugs. These pests can cause damage to the leaves and flowers of your orchid if left untreated. To address this issue, inspect your orchid regularly for any signs of pests and take immediate action if you notice any. You can use organic pest control methods or consult with a professional if the infestation is severe.
Root rot is another common issue that can occur during post-bloom care. This is often caused by overwatering or poor drainage, which leads to the roots becoming waterlogged and susceptible to fungal infections. To address this issue, carefully inspect the roots for any signs of rot or disease and trim them as necessary. Adjust your watering frequency and ensure that your orchid is planted in a well-draining potting mix.
Final Thoughts on Indoor Orchid Care: Post-Bloom Tips
In conclusion, post-bloom care is crucial for the health and future blooming of your indoor orchid. By providing the appropriate care during this stage, you are ensuring that your orchid has the best chance of thriving and producing beautiful blooms year after year. Proper watering, fertilizing, pruning, and repotting techniques are essential for successful post-bloom care. Additionally, it is important to avoid common mistakes and address any issues that may arise during this stage. With proper care and attention, your indoor orchid will continue to bring beauty and joy to your home for years to come.
If you’re looking for expert advice on how to care for your orchids indoors after they bloom, look no further than Lawn World. Their comprehensive guide provides valuable insights and tips to ensure your orchids thrive long after their beautiful blooms have faded. From proper watering techniques to ideal lighting conditions, this article covers it all. For more information, check out their article on caring for orchids indoors after bloom at https://www.lawnworld.com/sitemap.html.
FAQs
What are orchids?
Orchids are a diverse family of flowering plants that are known for their beautiful and exotic blooms. They come in a wide range of colors, shapes, and sizes, and are prized by gardeners and collectors around the world.
How do I care for orchids indoors after bloom?
After your orchid has finished blooming, it’s important to continue providing it with the right care to ensure it stays healthy and produces blooms again in the future. This includes providing the right amount of light, water, and fertilizer, as well as repotting the plant as needed.
What kind of light do orchids need?
Most orchids prefer bright, indirect light, but the specific amount of light they need can vary depending on the species. Some orchids, such as Phalaenopsis, can tolerate lower light levels, while others, such as Cattleyas, require more intense light.
How often should I water my orchid?
The frequency of watering your orchid will depend on several factors, including the type of orchid, the size of the pot, and the environment it’s in. In general, most orchids prefer to be watered once a week, but it’s important to check the soil moisture level before watering to avoid overwatering.
What kind of fertilizer should I use for my orchid?
Orchids require a specialized fertilizer that is high in nitrogen during the growing season and high in phosphorus during the blooming season. Look for a fertilizer specifically formulated for orchids, and follow the instructions carefully to avoid over-fertilizing.
When should I repot my orchid?
Orchids should be repotted every 1-2 years, or when the potting mix has broken down and is no longer providing adequate drainage. Repotting should be done in the spring, after the plant has finished blooming and new growth has started to emerge.


