
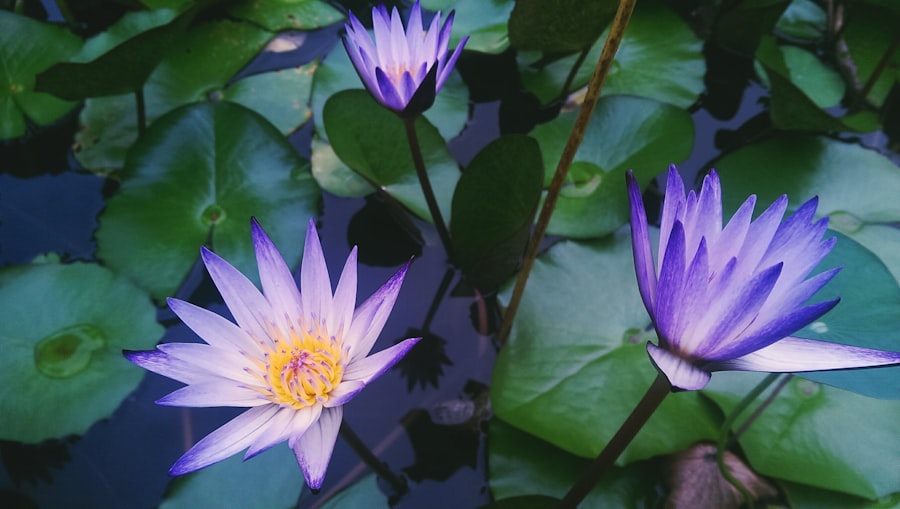
Post-Bloom Orchid Care: Tips for Long-Lasting Beauty

Post-bloom orchid care is an essential aspect of maintaining the health and vitality of these beautiful plants. After the stunning display of blooms, it is important to provide the proper care to ensure that your orchid continues to thrive. This includes adjusting watering and fertilizing routines, pruning and trimming, repotting when necessary, providing adequate lighting and temperature, preventing pests and diseases, propagating your orchids, and displaying them in creative ways. By understanding the life cycle of orchids and implementing the right care techniques, you can enjoy the beauty of these plants for years to come.
Key Takeaways
- Post-bloom orchid care is crucial for the plant’s health and future blooms.
- Understanding the life cycle of orchids helps in providing appropriate care.
- Watering and fertilizing orchids after blooming should be done carefully and in moderation.
- Pruning and trimming orchids can promote optimal growth and prevent diseases.
- Repotting orchids should be done when necessary and with proper techniques.
Understanding the Life Cycle of Orchids
Orchids go through several stages in their life cycle, and it is important to understand these stages in order to provide the appropriate care. The first stage is the vegetative stage, where the orchid focuses on growing leaves and roots. During this stage, it is important to provide ample water and nutrients to support growth. The second stage is the flowering stage, where the orchid produces its beautiful blooms. After blooming, the orchid enters a resting stage, where it conserves energy and prepares for its next growth cycle.
To identify which stage your orchid is in, you can look at its leaves and roots. During the vegetative stage, the leaves will be healthy and vibrant, and the roots will be actively growing. During the flowering stage, you will see the emergence of flower spikes and buds. After blooming, the leaves may start to yellow or wither, indicating that the orchid is entering its resting stage.
The life cycle of an orchid affects its care needs. During the vegetative stage, it is important to provide ample water and nutrients to support growth. During the flowering stage, it is important to provide proper lighting and temperature conditions to encourage blooming. After blooming, it is important to adjust watering and fertilizing routines to allow the orchid to rest and conserve energy.
Watering and Fertilizing Orchids After Blooming
After blooming, it is important to adjust your watering and fertilizing routines to ensure the health of your orchid. One common mistake is overwatering. Orchids do not like to sit in water, so it is important to allow the potting mix to dry out slightly between waterings. This will prevent root rot and other issues caused by excessive moisture. It is also important to use a well-draining potting mix that allows water to flow through easily.
When it comes to fertilizing, it is best to use a balanced orchid fertilizer with equal amounts of nitrogen, phosphorus, and potassium. After blooming, you can reduce the frequency of fertilizing to once every two weeks or once a month. This will allow the orchid to rest and conserve energy. It is also important to dilute the fertilizer according to the instructions on the package, as too much fertilizer can burn the roots.
To ensure optimal watering and fertilizing, it is important to observe your orchid and adjust accordingly. If the leaves start to turn yellow or wilt, it may be a sign of overwatering or underwatering. If the leaves start to turn dark green or become limp, it may be a sign of overfertilizing. By paying attention to these signs and adjusting your care routine accordingly, you can ensure the health and vitality of your orchid.
Pruning and Trimming Orchids for Optimal Growth
| Pruning and Trimming Orchids for Optimal Growth |
|---|
| Benefits of pruning and trimming orchids |
| 1. Encourages new growth |
| 2. Promotes better air circulation |
| 3. Prevents disease and pests |
| 4. Enhances the appearance of the plant |
| When to prune and trim orchids |
| 1. After flowering |
| 2. When the plant is dormant |
| 3. When the plant is overgrown |
| How to prune and trim orchids |
| 1. Use clean, sharp tools |
| 2. Cut at a 45-degree angle |
| 3. Remove dead or damaged leaves and stems |
| 4. Trim back overgrown roots |
Pruning and trimming are important aspects of orchid care that help promote optimal growth. Pruning involves removing dead or damaged parts of the plant, while trimming involves cutting back overgrown or unruly parts of the plant. By removing these parts, you can improve air circulation, prevent the spread of diseases, and encourage new growth.
When pruning an orchid, it is important to use clean and sharp tools to prevent the spread of diseases. You can use a pair of sterilized pruning shears or scissors to make clean cuts. It is important to remove any dead or yellowing leaves, as well as any dead or withered flower spikes. You can also trim back any overgrown roots or aerial roots that are getting too long.
When trimming an orchid, it is important to consider the overall shape and balance of the plant. You can trim back any overgrown or unruly stems or branches to maintain a compact and balanced appearance. It is important to make clean cuts just above a node or joint, as this will encourage new growth.
To ensure proper pruning and trimming techniques, it is important to observe your orchid and identify which parts need to be pruned or trimmed. By removing dead or damaged parts and maintaining a balanced shape, you can promote optimal growth and ensure the health of your orchid.
Repotting Orchids: When and How to Do It
Repotting is an important aspect of orchid care that should be done when necessary. There are several signs that indicate that your orchid needs to be repotted. These include overcrowded roots, yellowing or withering leaves, lack of growth or blooming, and a potting mix that breaks down or retains too much moisture.
When repotting an orchid, it is important to choose the right potting mix and container. Orchids prefer a well-draining potting mix that allows air to circulate around the roots. You can use a mix specifically formulated for orchids, such as a bark-based mix or a sphagnum moss mix. It is also important to choose a container with drainage holes to prevent water from sitting in the bottom.
To repot an orchid, start by gently removing it from its current container. You can do this by gently loosening the potting mix and carefully lifting the orchid out. Once the orchid is out of the container, you can gently remove any old or dead roots and trim back any overgrown or unruly roots. Then, place the orchid in the new container and fill it with fresh potting mix, making sure to leave enough space for the roots to grow.
To ensure successful repotting, it is important to water the orchid thoroughly after repotting and provide the appropriate care in the following weeks. This includes adjusting watering and fertilizing routines, providing adequate lighting and temperature, and monitoring the health of the orchid.
Providing Adequate Lighting and Temperature for Orchids
Lighting and temperature are important factors that affect the growth and blooming of orchids. Orchids require the right amount of light to produce energy through photosynthesis, and they also require the right temperature to thrive. By providing the appropriate lighting and temperature conditions, you can ensure the health and vitality of your orchid.
When it comes to lighting, orchids require bright but indirect light. They do not like direct sunlight, as it can burn their leaves. It is best to place your orchid near a window with filtered light or use a sheer curtain to diffuse the light. If you do not have access to natural light, you can also use artificial grow lights specifically designed for orchids.
When it comes to temperature, orchids have specific temperature requirements depending on their species. Most orchids prefer temperatures between 60°F (15°C) and 80°F (27°C) during the day, and slightly cooler temperatures at night. It is important to avoid extreme temperature fluctuations, as this can stress the plant. You can use a thermometer to monitor the temperature around your orchid and make adjustments as necessary.
To provide adequate lighting and temperature for your orchid, it is important to observe its response and make adjustments accordingly. If the leaves start to turn yellow or develop brown spots, it may be a sign of too much light. If the leaves start to turn dark green or become limp, it may be a sign of too little light. If the leaves start to droop or wilt, it may be a sign of temperature stress. By paying attention to these signs and adjusting your care routine accordingly, you can ensure the health and vitality of your orchid.
Preventing Pests and Diseases in Orchids
Pests and diseases can pose a threat to the health and vitality of your orchids. Common pests that affect orchids include aphids, mealybugs, scale insects, spider mites, and thrips. These pests can cause damage to the leaves, flowers, and roots of the orchid. Common diseases that affect orchids include fungal infections, bacterial infections, and viral infections. These diseases can cause discoloration, wilting, and decay of the plant.
To prevent pests and diseases in your orchids, it is important to maintain good hygiene practices. This includes regularly inspecting your orchids for signs of pests or diseases, removing any affected parts immediately, and keeping your growing area clean and free from debris. It is also important to quarantine new plants before introducing them to your collection to prevent the spread of pests or diseases.
If you do encounter pests or diseases in your orchids, it is important to take immediate action to prevent further damage. This may involve using organic or chemical pesticides to control pests, applying fungicides or bactericides to treat diseases, or isolating affected plants to prevent the spread of infections. It is important to follow the instructions on the product labels and take appropriate safety precautions when using pesticides or other chemicals.
To maintain healthy orchids and prevent pests and diseases, it is important to provide optimal growing conditions. This includes providing adequate lighting and temperature, adjusting watering and fertilizing routines, and maintaining good hygiene practices. By implementing these measures, you can ensure the health and vitality of your orchids.
Orchid Propagation: How to Multiply Your Collection
Orchid propagation is a rewarding way to multiply your collection and share the beauty of these plants with others. There are several methods of orchid propagation, including division, backbulb propagation, keiki propagation, and seed propagation. Each method has its own advantages and challenges, so it is important to choose the method that is best suited for your orchid and your skill level.
Division is one of the most common methods of orchid propagation. It involves separating a mature orchid into two or more smaller plants. To divide an orchid, start by removing it from its container and gently separating the roots. You can use a clean and sharp knife or scissors to make clean cuts. Make sure that each division has at least three healthy pseudobulbs or growth points, as this will ensure that it has enough energy to grow.
Backbulb propagation is another method of orchid propagation that is suitable for certain types of orchids. It involves removing the backbulbs, which are older pseudobulbs that have finished blooming. To propagate an orchid using backbulbs, start by removing the backbulbs from the main plant and placing them in a separate container with fresh potting mix. Make sure to keep the backbulbs slightly above the surface of the potting mix to prevent rotting.
Keiki propagation is a method that is specific to certain types of orchids, such as Phalaenopsis orchids. Keikis are small plantlets that grow from the nodes along the flower spike of the orchid. To propagate an orchid using keikis, start by allowing the keiki to develop roots and leaves. Once the keiki has developed a few roots and leaves, you can carefully remove it from the main plant and place it in a separate container with fresh potting mix.
Seed propagation is a more advanced method of orchid propagation that requires specialized equipment and techniques. It involves collecting and germinating orchid seeds to produce new plants. This method is often used by orchid breeders to create new hybrids. To propagate orchids using seeds, it is important to follow specific protocols for sterilization, germination, and growth. It can take several years for orchid seeds to develop into mature plants, so patience is required.
To ensure successful orchid propagation, it is important to provide the appropriate care for the new plants. This includes adjusting watering and fertilizing routines, providing adequate lighting and temperature, and monitoring the health of the plants. By following these steps, you can multiply your collection and enjoy the beauty of orchids in your home.
Orchid Display: Creative Ways to Showcase Your Blooms
Orchids are not only beautiful plants, but they can also be used as decorative elements in your home. There are many creative ways to showcase your orchids and create visually appealing displays. Whether you have a single orchid or a collection of orchids, you can incorporate them into your decor to add a touch of elegance and beauty.
One idea for displaying orchids is to use hanging baskets or mounted displays. You can hang your orchids from the ceiling or mount them on a piece of driftwood or cork bark. This allows the orchids to cascade down and creates a stunning visual effect. You can also use hanging baskets or mounted displays to create a vertical garden with multiple orchids.
Another idea for displaying orchids is to use terrariums or glass containers. You can place your orchids in a glass container with a lid to create a mini greenhouse effect. This allows you to control the humidity and temperature around the orchids, which can be beneficial for certain species. You can also add decorative elements such as moss, rocks, or figurines to create a unique and personalized display.
If you have a collection of orchids, you can create a dedicated display area to showcase your blooms. This can be a shelf, a table, or a windowsill. You can arrange your orchids in a visually appealing way, grouping them by color or size. You can also add decorative elements such as fairy lights, candles, or artwork to enhance the display.
To incorporate orchids into your decor, you can also use them as centerpieces or focal points in your living room, dining room, or bedroom. You can place a single orchid in a decorative vase or pot and use it as a statement piece. You can also create a floral arrangement with multiple orchids and other flowers to add color and fragrance to your space.
When it comes to displaying orchids, the possibilities are endless. It is important to choose a display method that suits your personal style and complements your existing decor. By incorporating orchids into your home, you can create a visually appealing and inviting space that showcases the beauty of these plants.
Orchid Care FAQs: Common Questions Answered
Orchid care can sometimes be challenging, especially for beginners. There are many common questions that arise when it comes to caring for orchids. Here are some frequently asked questions about orchid care, along with tips for troubleshooting common issues and additional resources for more information.
Q The COVID-19 pandemic has had a significant impact on various aspects of society, including the economy, healthcare systems, and daily life. One of the most noticeable changes has been the shift towards remote work and online learning. With the implementation of social distancing measures and lockdowns, many companies and educational institutions have had to quickly adapt to a virtual environment. This transition has not been without challenges, but it has also presented opportunities for increased flexibility and accessibility. As a result, individuals and organizations have had to embrace new technologies and find innovative ways to collaborate and communicate remotely.
If you’re wondering what to do with your orchid after it has finished blooming, look no further than this informative article on Lawn World. This comprehensive guide provides step-by-step instructions on how to care for your orchid once it has finished flowering. From pruning and repotting to providing the right amount of light and water, this article covers all the essential tips and tricks to ensure your orchid stays healthy and vibrant. Don’t miss out on this valuable resource – check out the article here.
FAQs
What should I do with my orchid after it has finished blooming?
After your orchid has finished blooming, you should cut the flower spike down to the base of the plant. This will encourage the plant to produce a new spike and bloom again in the future.
How often should I water my orchid after it has finished blooming?
You should continue to water your orchid regularly after it has finished blooming. However, you may want to reduce the amount of water you give it slightly to prevent overwatering.
Should I fertilize my orchid after it has finished blooming?
Yes, you should continue to fertilize your orchid regularly after it has finished blooming. This will help to promote healthy growth and encourage the plant to produce a new flower spike.
Can I repot my orchid after it has finished blooming?
Yes, you can repot your orchid after it has finished blooming if it needs it. However, it is best to wait until the plant has finished producing new growth before repotting.
How can I encourage my orchid to bloom again?
To encourage your orchid to bloom again, you should provide it with the right growing conditions, including the right amount of light, water, and fertilizer. You should also make sure to cut the flower spike down to the base of the plant after it has finished blooming.


