
Simple Steps to Grow Aloe Vera from a Leaf
Rich with own history, lauded for its comprehensive health benefits, and surprisingly straightforward to cultivate, Aloe Vera is indeed a fascinating plant you would want in your dwelling. This essay offers an extensive guide that steers you through the process of growing an Aloe Vera plant right from a leaf – channeling focus from the initial selection and preparation of a healthy, viable aloe leaf to the in-depth care needs once your new plant begin its flourish. Needless to say, the vibrant appeal and the practical benefits of aloe vera will make every effort worthwhile, and having your touch of nature within reach will certainly enrich your space and living experience.
Aloe Vera Leaf Selection and Preparation
The Essential Guide for Choosing and Preparing Aloe Vera Leaf for Propagation
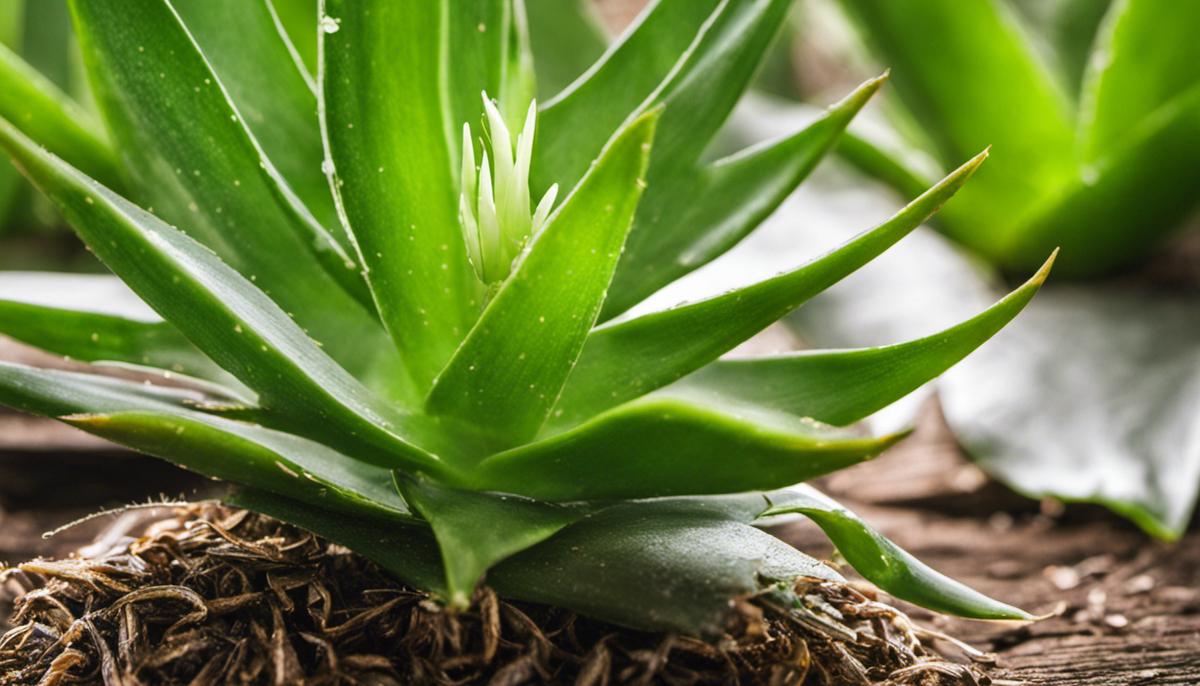
Enchanting and dynamic, the world of Aloe Vera propagation is filled with thrill, marvel, and, most notably, deep satisfaction! As enthusiastic hobbyists, it’s easy to appreciate the mind-boggling capacity of these evergreen succulents. Their ability to multiply is a true testament to nature’s beauty! So, how does one, immersed in the world of Aloe Vera, select and prepare a leaf correctly for propagation? Here we go!
First things first – the choice is crucial! One should choose a mature plant, preferably more than two years old. Mature Aloe Vera plants are more likely to produce healthy pups ready for propagation. Inspecting the plant, it’s also essential to make sure it’s healthy. A healthy leaf will be thick, green, and free from spots or signs of disease.
Next comes the detachment. As hobbyists, it’s best to intervene gently. Be sure to use a clean, sharp knife to cut the pup off at the base where it attaches to the mother plant. The ideal spot has some roots, but it’s not the end of the world if it doesn’t. Rooting is possible either way!
But here’s the catch – patience is paramount! After removing the pup, put it aside. Let it sit out in a warm, dry place, like a windowsill out of the sun for about a week. This gives it time to callus over, which will protect the youngster from rotting. Tenderness is key!
Once the wait is over, it’s propagation time, the true essence of a hobbyist’s life! Choose a container with good drainage and fill it with a cactus potting mix or a mix of equal parts sand and potting soil. Then, plant the pup leaf-first into the soil. Don’t bury it too deep! About two-thirds of the leaf should stay above the soil.
Less is more when it comes to watering. A frequent mistake of overzealous propagators is overwatering. The first watering should take place about a week after planting. Subsequent waterings should be light, just enough to keep the soil from going bone dry.
Choosing and preparing an Aloe Vera leaf for propagation doesn’t require a green thumb as such. It’s more about patience, gentle treatment, and a bit of that hobbyist spirit we all share! Here’s to flourishing, sun-drenched, and ever multiplying Aloe plants! Enjoy the propagation process, and more importantly, have fun while doing it!

Rooting and Planting the Leaf
The Right Way to Root and Plant an Aloe Vera Leaf
Aloe Vera, with its myriad benefits and pleasing aesthetics, has captivated the hearts of indoor gardening enthusiasts worldwide. After meticulously choosing a mature and healthy mother plant, detaching a pup with care, and allowing for the process of callusing, it’s time to delve into the next stage: the proper rooting and planting of your Aloe Vera leaf.
Primarily, the selection of a suitable rooting hormone becomes crucial. While Aloe Vera can root on its own, the use of a rooting hormone, such as a honey-water mixture or a commercial root stimulator, can expedite the process and improve the mortality rate. Immerse the callused end of the leaf in the hormone for a few moments before planting it in the soil.
Now, it’s time to start planting. Remember, the pup should already be in a container with a well-draining soil mix. Carefully lodge the leaf into the mix, with the callused part buried beneath the surface, ensuring stability. You may use a spoon to gently press the soil around the leaf and provide firm support. Be careful not to push the leaf too deep into the soil, as this could hinder the growth process.
With the leaf firmly in place, position the newly planted pup in an area with indirect sunlight. Aloe Vera thrives best in bright but indirect light. Too much direct sunlight can scorch the leaves, while inadequate light can impede growth. Hence, choosing the right location for your plant is paramount.
Maintaining an optimal temperature is also necessary for the successful propagation of Aloe Vera. The plant prefers warm conditions, ideally between 55 and 80°F. If you don’t live in a primarily warm climate, don’t fret! Aloe Vera, as a succulent, can handle occasional cold spells. However, it’s advisable to bring your plant indoors during frosty seasons to prevent damage.
Equally essential is the control of pests and diseases. Aloe Vera plants can fall prey to common succulent pests like mealybugs and aphids. Regularly inspect your plant and treat infestations early using insecticidal soap or neem oil to ensure robust growth.
Last but not least, refrain from over-fertilizing. A monthly dose during the growing season (spring and summer) with a half-strength balanced houseplant fertilizer will suffice. In the dormant season (fall and winter), hold back on the feeding to give your plant some rest.
In the end, remember that every plant is unique and might require small adjustments in their care. As you embark on this exciting journey of propagating Aloe Vera, don’t forget to enjoy every step of the process, learning from all the triumphs and trials along the way. Happy gardening!
Caring for New Aloe Vera Plant
After successfully propagating your Aloe Vera pup, the journey is just at its dawn. The journey of nurturing a newly grown Aloe Vera plant is both fascinating and rewarding. Above and beyond the needs already addressed in raising an Aloe Vera pup, there are added intricacies to consider. Get ready; it’s time to delve into these nuances!
Just like humans, plants benefit enormously from early intervention. With this newly propagated Aloe Vera plant, using a rooting hormone can pay great dividends. This seemingly small step can bolster root development and foster a healthy plant from the beginning. The best forms are usually water-soluble powders, but a liquid form may also suffice. Remember, it has to be used sparingly to curb overwhelming the plant.
After a gentle application of the rooting hormone, it’s time to put your green fingers to work. Planting the Aloe Vera leaf isn’t a complex task, but demands careful attention to details. Place it upright in the soil mix, with the cut end facing downward. Keep the top heavy leaf propped against the side of your pot to prevent it from touching the soil and risking rot. Just recall the golden rule: plant them shallowly!
Sunlight is crucial for these succulent plants. But remember, it’s all about balance. An Aloe Vera plant relishes bright, indirect sunlight. Direct, hot sun can scorch the leaves, while too little light can lead to weakened growth. Consider placing the plant near a north or south-facing window for that perfect dose of light.
Ensuring optimal temperature conditions is pivotal to thriving Aloe Vera plant care. These plants are tropical and do well in temperatures between 55 and 80 degrees Fahrenheit. They can tolerate cooler temperatures during the winter dormant phase, but remember, they can’t endure frost or prolonged periods of cold.
Pests and diseases are invaders your beloved Aloe Vera could certainly do without. Keep a vigilant eye for common culprits like aloe mites, mealybugs, or aphids. Stave them off with bi-weekly leaf inspections and the occasional application of a suitable insecticidal soap or Neem oil. Be proactive; a pest-free plant is a happy plant!
One common misconception among new hobbyists is the need for constant fertilization — let’s clear this up! Aloe Vera plants, being succulent, store ample nutrients in their leaves and hence don’t require frequent fertilization. Over-fertilization can lead to root damage and discolored, soft leaves. If you do choose to fertilize, use a water-soluble, balanced houseplant fertilizer and follow the package directions strictly.
Last but not least, be prepared for some trial and error in your Aloe Vera journey. These plants, like people, have their unique characteristics and will react differently to care. Small adjustments in light, water, and temperature can often make a world of difference. Embrace these discoveries as part of the joy ride of Aloe Vera plant care!
In the grand scheme of things, caring for an Aloe Vera requires some love, a pinch of science, and copious enthusiasm. Now, how about getting those green thumbs at work? Happy Aloe Vera parenting to all the plant enthusiasts out there!
Throughout this informative journey, we have traveled from the initial stages of selecting and preparing an aloe vera leaf to the complex care regimen of a new plant. It’s interesting to imagine that a simple leaf, with the correct nurturing, can transform into a source of medicinal and cosmetic wonder. The propagation process for aloe vera might require patience and attention, but the end result is both rewarding and enriching in numerous ways. Channel the green thumb in you, practice what you have learned here, and may your home be ever enriched with the vital, healing presence of your own grown Aloe Vera.


