
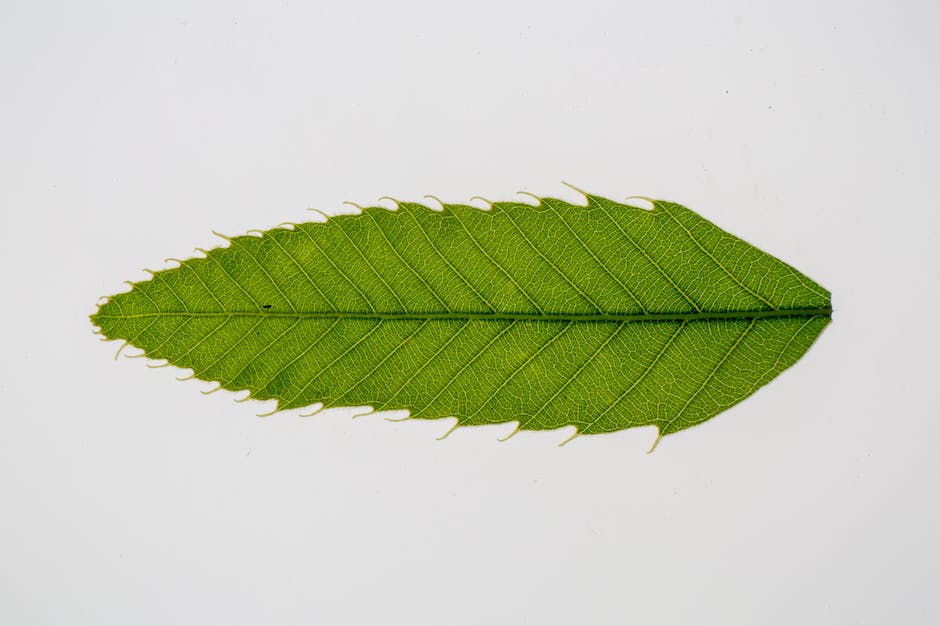
Step by Step Guide on How to Grow Chestnut Trees from the Nut

Embracing the wonders of mother nature starts with nurturing a single seed or, in this case, a chestnut nut. The saga of growing a towering, chestnut tree, laden with its glossy, flavorful seeds, begins with something as simple yet essential as the mere selection and preparation of these nuts. The journey continues with comprehending the fine art of planting these seeds – understanding the soil’s crucial role, the sun’s radiant nourishment, and the nut’s depth in the comforting cradle of the earth. And it doesn’t end here. Beyond the planting phase lies the meticulous task of ensuring proper aftercare for these infant saplings, protecting them from the cruel clutches of weeds, pests, and ensuring they receive adequate water and nutrients to grow.
Chestnut Nut Selection and Prep
The Amateur Chestnut Enthusiast’s Guide: Selecting and Preparing Chestnuts for Planting
When it comes to growing strong and healthy chestnut trees, it all starts with the quality of the chestnuts selected for planting. The exciting world of chestnut cultivation allows hobbyists of any skill level to yield rewards from their hard work and patience. Dive in, and discover the joy that comes from nurturing these noble trees from tiny chestnuts into thriving saplings.
The first point of call is the selection process. One may wonder, “What makes an ideal chestnut for planting?” The answer lies in size, uniformity, health, and density. Chestnuts that are larger, rounder, and heavier tend to harbor more nutrients, tremendously boosting their germination odds. It’s essential to inspect the nut for any visible flaws such as cracks or holes, indicating insect infestations or diseases.
Chestnuts should be as dense as they can be. A handy tip is doing the “Float Test”. Submerge the potential planting chestnuts in a bucket of water; those that sink are dense and more likely to germinate successfully, while floaters are possibly damaged or infected and should be discarded.
When you’ve gathered a batch of viable, dense chestnuts, the preparation phase begins. One popular preparation method involves stratification, also known as cold-moist storage. This process mimics the natural winter conditions that stimulate the chestnut’s biological readiness for germination.
Start by soaking the chestnuts in cool water overnight, then drain them. Proceed by placing the moist chestnuts in a sealable plastic bag filled with a damp mixture of peat moss or sand. The added material should be moist but not soaking. This bag should be stored in a refrigerator set to a temperature between 32°F (0°C) and 40°F (4°C), approximately the temperature experienced by chestnuts in winter.
To prevent fungi or mold development, it’s advisable to check on the chestnuts periodically, perhaps once every couple of weeks. If you notice any chestnuts have rotted, remove them promptly to keep the remaining ones healthy.
Around mid-April, nearly two weeks before the estimated planting date, it’s time to examine your chilled chestnuts. You’ll march to the beat of triumph when you notice the taproot or radicle poking out. That’s a sure sign of successful germination.
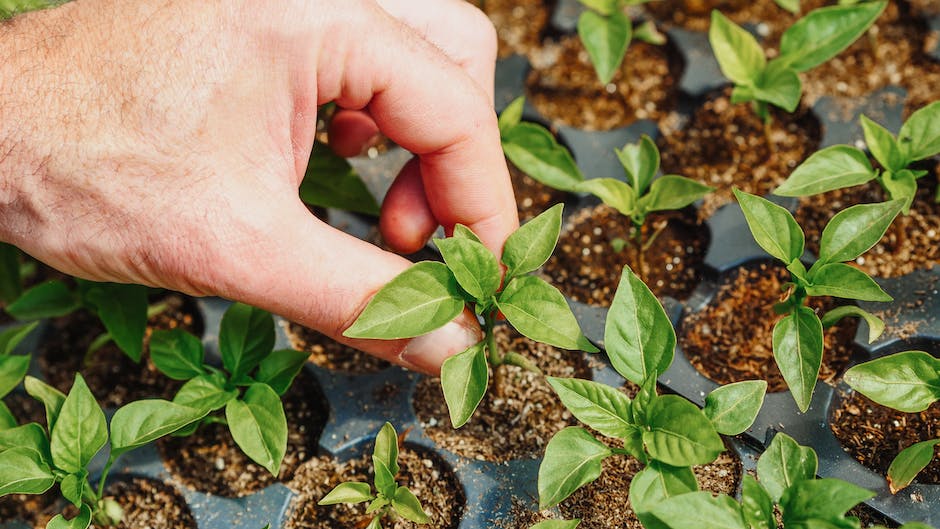
When your chestnuts have sprouted, that’s the green light to transition them outdoors. With their roots ready to delve deeper, they can now be planted in a suitable spot with well-draining soil and adequate sunlight.
Beware of planting them too deep; an inch or two will suffice. Linking arms with mother nature to grow chestnuts is not just a hobby; it’s an adventure woven into the fabric of life itself. Happy planting, chestnut enthusiasts!
Planting the Chestnut Nut
Now that you’ve meticulously selected and prepared your chestnuts, and keenly learned to spot and combat mold or fungi, let’s navigate the rewarding journey of sowing these future giants.
Timing, as they say, is everything. And with chestnuts, the rule rings true. The ideal time to plant sprouted chestnuts outdoors depends on your region’s climate. Generally, the sprouting season falls in late winter or early spring, after the harsh winter frosts have passed but before the blistering summer heat takes the stage. We’re aiming for a Goldilocks window of time that’s ‘just right.’. The frost should be over, and the soil should be in a state where it can retain moisture, isn’t freezing, and allows for the roots of chestnuts to penetrate easily.
Having chosen the perfect time come planting comes into play. Remember those sprouted chestnuts you’ve been nurturing for weeks? It’s their time to shine. Start by digging a hole that is about 2-3 times as deep as the nut itself. Aim for around 3 inches deep. The sprout should point downwards, diving into the depths while the nut itself should be just below the soil surface.
Maintaining a safe distance between the saplings is crucial too. Give each chestnut tree a luxury of space – an average of 20 feet apart, if possible. This will let the trees spread their branches freely and prosper without competing for nutrients. What we aim for here is a happy, harmonious chestnut community.
It’s also of prime importance to keep the marauding wildlife in check. Deer, squirrels, rabbits, and even some birds find young chestnut saplings more tempting than a gourmet meal. Chicken wire fencing or any other form of rodent protection around each planting site may be a wise investment if you’re in an area abundant in wildlife.
Providing shade is also an integral part of chestnut care. Once planted, shading the nut with a bit of mulch, straw, or leaf litter can provide protection from the sun’s scorching heat waves. This also shields them from heavy rains that can potentially uproot them.
Watering consistently is a must. A few cups of water every day per sapling should suffice, depending on your local rainfall and temperature. These fledgling giants will thank you by transforming into sturdy trees, who not only add beauty to your landscape but also treat you with an annual bounty of chestnuts.
Remember, planting a chestnut is akin to planting a legacy. These majestic trees have an average lifespan of 200-800 years. It’s not just about scattering seeds in the soil. It’s about crafting a nurturing environment that allows your chestnuts to grow and thrive. You’re creating a lasting emblem of nature’s beauty that future generations may marvel at. Now, that’s what I call a hobby!
So, happy chestnut planting, folks! As your hands get soiled with the essence of Mother Earth, remember the joy of seeing these sprouted chestnuts transform into towering, fruit-bearing trees is well worth the work. Here’s to creating legacies, one chestnut at a time!

Aftercare for Chestnut Saplings
The Great Chestnut Adventure: Aftercare for Your Growing Saplings
Embarking on the journey of growing chestnuts from seed to tree is truly satisfying. You’ve skillfully navigated the pre-planting stage, selecting the finest chestnuts, preparing them for planting, and finally setting them into nature’s green bed. Now, having witnessed the grand emergence of the chestnut sapling, what’s next?
Now comes the crucial and prime salvation mission – aftercare. This stage is critical to withstand and let your saplings thrive in the ruthless twist and turns of nature. Let’s unravel the steps in the right order for the optimal sapling care.
Firstly, the timing for planting sprouted chestnuts outdoors is paramount. Always ensure you are placing your sprouted saplings into the ground in spring, after the last frost, or in early fall.
The technique for digging the hole and planting the chestnut seed is an art in itself. The hole should be dug at least double the size of the root ball and deep enough to accommodate the taproot. Place the sprouted chestnut in such a way that the sprout is pointed upwards.
Considering spacing for chestnut trees is significant to prevent overcrowding and competition for nutrients and water. Ensure a minimum distance of 15 to 20 feet between each sapling.
Wildlife, aesthetic in nature but quite a menace for our chestnut saplings. Saplings are highly susceptible to being grazed by deer, rodents, and even snails. To counter this, use cylindrical tree guards or fences around each sapling.
Chestnuts saplings are quite a delicate species when young, requiring range of sunlight and shade mix. Strategically provide shade to shield your saplings from harsh, sun-scalding summers while permitting adequate sunlight for healthy growth.
Watering, the elixir of life, too plays a prominent role in the survival and growth of chestnut saplings. Newly planted saplings need consistent, deep watering. Soak the root zone thoroughly at the time of planting and continue with regular watering until the sapling is well established.
Growing chestnuts is like raising a child – you pat, bear, care, and watch them grow. But the beauty is the long lineage. Chestnuts are long-lived trees, existing for decades, and even centuries, casting an enduring legacy.
In the enamored world of chestnut cultivation, year by year, you are not merely growing a tree, but preserving an ecosystem, leaving behind a legacy, creating a shelter for decades to come. So, abide by the aftercare mantra of “good timing, appropriate planting and spacing, protection, shade, watering, and patience” for your chestnut sapling to thrive into a strong, burly tree, bearing bountiful of chestnuts. Adventure awaits! Keep nurturing and landscaping with confidence, one sapling at a time!
Becoming attuned to the unique needs of your burgeoning chestnut tree is a genuine endeavor of love and persistence. It requires an understanding of a wide array of factors, from the selection of robust chestnuts for planting to their detailed preparation processes, the proper planting methods and maintaining a nurturing environment to ensure the growth and prosperity of these new saplings. Equipped with this knowledge, you are now prepared to embark on the rewarding journey of chestnut propagation. As you engage in this rhythmic dance of nature, imagine the final result, your very own chestnut tree, growing contentedly in your backyard, casting a shadow of pride and achievement.


