
A Simple Guide to Drying Herbs in Your Oven

Acquiring the ability to proficiently dry herbs in your own kitchen oven can be a rewarding and cost-effective skill. Drying your own herbs not only provides an opportunity to enjoy self-sufficient sustainability, but it also allows for the preservation of home-grown or bulk-bought herbs in their freshest state. This essay intends to deliver comprehensive insights into three main aspects of oven-drying herbs. Initially, we’ll delve into the correct preparation methods for herbs pre-drying such as careful cleaning, sorting, and preparation techniques. Secondly, we’ll venture into oven drying techniques by explicating details such as favorable temperatures, timing, and how to evade the risk of over-drying. Finally, we will delve into efficient storage methods for dried herbs to not only maintain their distinct flavor but also to maximize their longevity. Darkened mason jars or vacuum-sealed bags? What conditions are most conducive to preservation? Let’s begin our journey to ephemeral herb preservation.
Correct Preparation of Herbs for Drying
“Unlock the Full Flavor Spectrum: The Art of Oven-Drying Herbs”
Gone are the days when the only herbs we knew were those elusive powders trapped within glass shakers. Oh, the wondrous realm of fresh herbs! They add depth, richness, and an effervescent punch to any savory delight. Oftentimes, however, we find ourselves with an overflow of fresh little leafy wonders with an impending expiration. Fear no more! Instead of watching them wilt away, we can breath new life into them – say hello to the art of oven-drying herbs.
What gratification one can experience by preserving these taste agents! It’s like capturing the spirit of summer and keeping it handy all year round. Now brace yourselves! The following guide will teach you how to lock flavor in and coax those oils out, creating a potent punch for your signature dishes. It all begins with the right preparation.
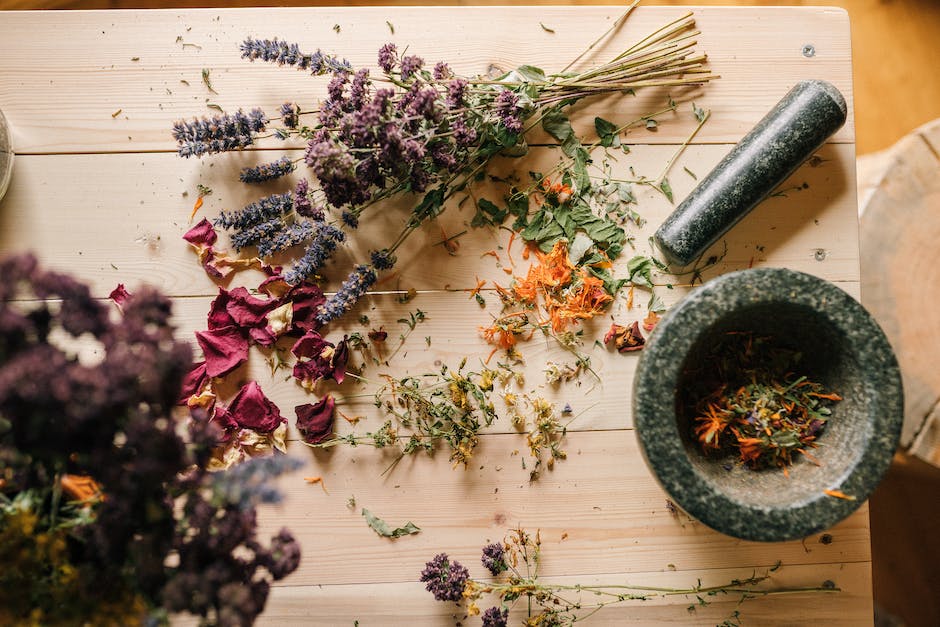
- Selection and Cleaning: Choose your freshest and healthiest looking herbs. Avoid any hint of wilting or yellowing, as these aren’t ideal for drying. Wash them gently under cool water to clean. Pat dry using a clean towel, removing as much excess water as possible.
- Prep: After cleaning, separate the leaves from the tougher stems. While stems of soft-herbs like cilantro and parsley can be dried, hard-herbs like rosemary, thyme, and mint have tough stems that don’ dry well.
- Space Out: Preheat your oven to its lowest setting, which is usually around 180°F. Spread the leaves in a single layer on a baking sheet. Make sure none overlap, as this can cause them to steam and lose flavor.
- Slow and Low: Place your herbs into the preheated oven. Keep the door slightly ajar to allow moisture to escape and help prevent the herbs from cooking or burning. Alternatively, you can occasionally open the door to achieve the same effect.
- Check: Oven-drying herbs typically takes around 1-2 hours. However, keep an eye on the herbs as different types might dry out at varying rates. Once the leaves crumble between your fingers, they are ready to cool.
- Cool and Store: Remove from the oven and allow the herbs to cool before storing. Crumble them up and store in an airtight container to retain flavor; clear glass jars are ideal to keep track of your treasures.
And that’s it! Now you have perfectly dried herbs available at your fingertips. An essential trick every food lover should have up their sleeve. What’s the next dish waiting to be revamped with this newfound flavor powerhouse? The culinary world is your oyster. Let these newly dried flavor bombs enhance those food adventures we all can’t resist. Warning: Once you dive into the delightful universe of oven-drying herbs, there’s no turning back. Prepare to have your savory games skyrocket!
Proper Oven Drying Techniques
Harnessing Flavor: The Art of Drying Herbs in the Oven
The kitchen is a vast wonderland filled with diverse flavors and techniques. For passionate food enthusiasts, one such technique that marvelously unlocks an unparalleled form of taste is drying herbs. But how does one learn the craft of capturing the essence of herbs via drying, particularly in the oven, without the need for specialized equipment? Don’t fret. Walk with us as we unravel the secret to maintaining the vibrant and potent flavor of your favorite herbs.
Before anything else, the first step is paramount – preparing your oven. Set your trusty oven to a low and slow temperature, ideally between 180 to 200 degrees Fahrenheit. This gentle heat ensures the herbs retain their aroma, flavor, and beneficial properties. Similarly, remember to slightly ajar the oven door to let moisture escape and ensure proper drying. Now, hold tight to this temperature regime and adjust as per your oven nuances – no herb deserves to be burned!
Next, it’s important to talk about how to arrange herbs onto the baking sheet. A neophyte’s mistake would be to clump them all together. Avoid this trap like the plague! Herbs need personal space, frankly, just like us humans. Spread them out in a thin, evenly distributed layer on the tray. This allows heat to circulate uniformly and leads to an even drying process.
Now, onto understanding the critical timeline of herb drying. Starting from 20 minutes, it’s essential to check the progress of drying periodically. It’s not the time to step away and binge-watch your favorite food channel! Be alert! The ideal dried herb should crumble easily and not feel spongy or moist. Depending on the type and size of the herb, drying times may vary up to 2-3 hours. Be patient! Culinary perfection never comes in a rush!
After your herbs are crisply dried, do not, and we repeat, DO NOT immediately store them. Give them time to cool down, let them rest. Even the mightiest warriors need their downtime, right? After cooling, it’s finally time for the grand finale – storing. Pour the dried herbs into air-tight glass jars away from the light, and voila! You have now successfully harnessed the wonderful aromatic and flavorful punch of dried herbs ready to be unleashed in your diverse culinary creations.
Remember, preserving herbs is preserving Nature’s paint to the canvas of our culinary creations. It requires the simplicity of processes but the patience of time. Staying true to this craft, you get to keep the magic of summer alive in your kitchen even in the heart of winter. All set to try it out? Happy culinary experimenting, fellow food enthusiasts!
Storage Methods for Dried Herbs
Let’s dig into the nitty-gritty of how to store oven-dried herbs properly. After mastering the art and science of selecting, cleaning, and oven drying herbs, ensuring they retain their flavor and fragrance long after the process is fundamental for successful cooking adventures.
First on the agenda is the ideal container for storage. Glass jars with airtight lids take center stage here, as they seal in freshness while preventing the entry of moisture, which could potentially ruin your precious herbs. Small to medium-sized mason jars are perfect, depending on your quantity of herbs, providing both function and aesthetic appeal in your kitchen space.
Speaking of space, light, air, and temperature conditions matter tremendously too. Direct sunlight, hot stoves, or radiators are the arch-nemesis of your dried herbs, degrading their flavor and quality faster than you can say, “Oh, Basil!” Store your packed glass jars in a cool, dark place to preserve the essence of your herbs. The back of your pantry or a dark cupboard, ideally away from the stove, are ideal choices.
Now onto the packaging process. Despite the temptation, never crush or ground your dried herbs before storing them. Keeping them in larger pieces ensures the preservation of their oils, which are the key to the flavors and aromas we all adore. So, pack the herbs in their natural dried state, and crush or toss them into dishes as needed.
Labeling your jars is equally important. While you might consider yourself an herb maestro, accurate identification can get challenging, especially with similarly colored and textured herbs. Labelling helps to keep confusion at bay! Date your labels too, as over time, dried herbs lose their muscle, typically around 1-3 years, depending on the herb type.
For all your culinary experimentations, remember that oven-dried herbs have a more concentrated flavor than fresh ones. So, when substituting dried herbs for fresh in a recipe, a rule of thumb is to use a third of the quantity specified for fresh herbs.
Lastly, don’t forget to enjoy the process of preserving Mother Nature’s paint in your kitchen! These carefully stored, oven-dried herbs stand poised to take your cooking feats to the next level, infusing meals with an array of medicinal benefits, vibrant color, and of course, that delicious burst of flavor. As foodies would wholeheartedly agree, food is not only about nourishment but about creating experiences with depth, sharing, and unity.
The knowledge and strategies envisioned with this discussion will guide you on the path to becoming proficient in drying and storing your herbs. Whether you have a bounty from your garden or took advantage of a sale at a local farmers market, these techniques will help you preserve those precious herbs for months or even years to come. With the insights provided on the drying process and the proper storage methods, you will be able to extend the freshness and flavor of herbs and ultimately, revolutionize your gastronomic experience. Remember, mastering a new skill takes time and experience; feel free to experiment with different herb types, drying times or storage methods until you discover what works best for you. Embrace the journey and enjoy the bounty of taste and aroma that home-dried herbs can bring to your kitchen.


