
Growing a Plum Tree from Seed: A Simple Guide
The palpable joy of biting into a fresh, juicy plum plucked straight from your own backyard tree is an experience everybody should have. This pleasure is amplified when the tree sprung from a seed you planted and nurtured yourself! If you’ve been considering growing your own plum tree, this guide is designed to equip you with the essential knowledge needed to embark on this rewarding endeavor. From selecting the perfect plum seed to nurturing it into a full-grown, fruit-bearing tree, the process, while requiring patience and effort, can be informative, enjoyable, and immensely satisfying.
Choosing and Preparing the Plum Seed
Cultivating Exuberance: Choosing and Preparing Plum Seeds the Right Way
Every budding gardener knows the allure of a flourishing fruit tree, bearing its vibrant, juicy rewards. Plums are one such delight that mesmerize hobbyists with their glossy purple skin and sweet, tangy pulp. However, the journey from plum seed to plum tree involves meticulous care, strategic choice, and patient preparation. Let’s take gardening prowess to a whole new level by understanding the proper way to choose and prepare a plum seed for planting.
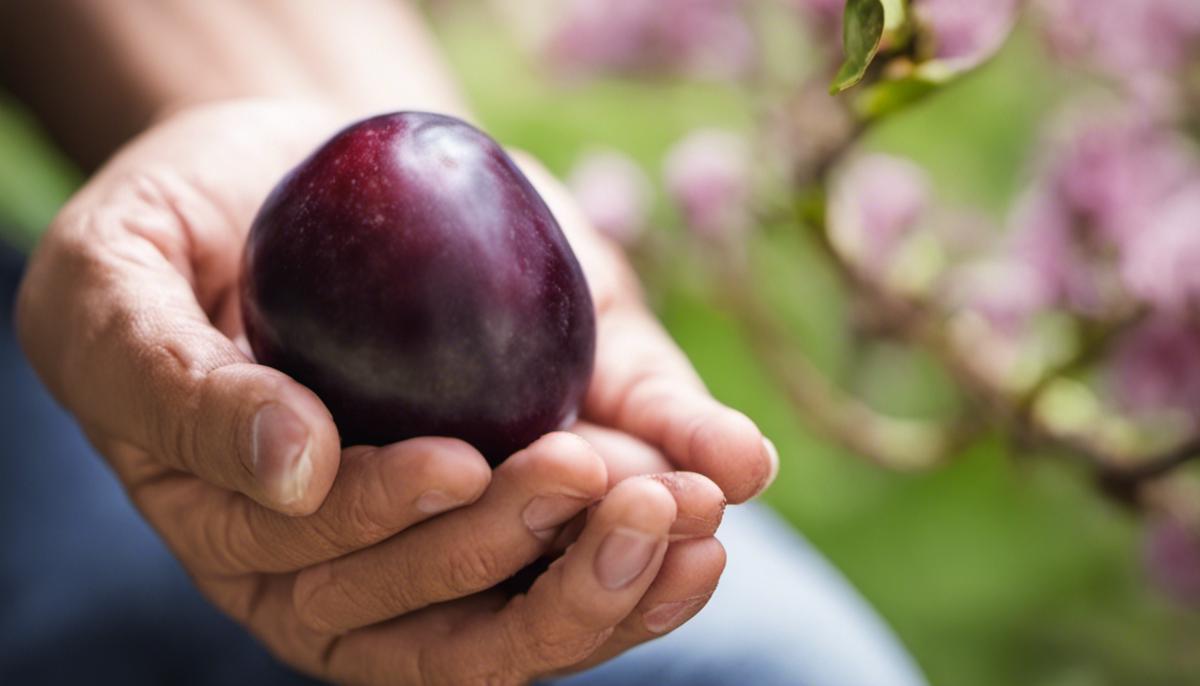
Choosing the right seed is the stepping stone to a thriving plum tree. After savoring the fruit, don’t hastily discard the stone; it’s a potential tree in disguise! The first step is selecting a ripe, high-quality fruit from a plum tree that grows locally. This helps ensure the tree is well-suited to the conditions in your area – a win-win situation right out of the gate.
Once in the possession of the perfect plum, it’s time for cleaning. After removing the seed, rinse it gently under running water. Scrub off any clinging fruit remains to prevent mold or fungus from sabotaging your sprouting efforts. Dry it with a soft cloth and then air dry for a couple of hours to ensure it is thoroughly moisture free.
Now comes the fascinating part, stratification – a fancy term for ‘tricking’ the plum seeds to think they’ve survived winter, as this cues them to sprout. This is where your aid is paramount. Place the cleaned, dry seed into a zip-top bag filled with moist (not wet) peat moss or vermiculite. Seal the bag.
The bag then goes into your refrigerator, effectively mimicking the winter season. Temperature is critical here; most plum seeds prefer chilling in temperatures around 33 to 40 degrees Fahrenheit. After this simulated winter nap, which should last at least ten weeks, the seed will think it’s springtime and ready to sprout roots.
Upon noticing these sprouts, it’s finally time to plant the seed in potting soil! Plant it with the root facing down in a pot deep enough for the young roots to stretch – typically a 4” pot suffices in the early stage. Cover with soil and water regularly but mindfully, avoiding overwatering.
Remember, patience is key in this process. The reward of observing this cycle of life, and the anticipation of the tree maturing to bear fruit, is indescribable. The joy of gardening is in this journey from the tiny seed to the towering tree, making it an adventure worth undertaking. Happy planting!
Planting the Seed
The Art of Cultivating a Plum Tree from Seed: The Later Stages
Plum trees are truly a delight in any hobbyist’s garden. Let’s explore how to nurture the cultivation phase, post-stratification, to ensure the future health of your budding plum tree.
After the detailed stratification process, your seed is more than ready to kick start its journey into a full-fledged tree. This rigorous process has equipped the seed with enough vigor to withstand external conditions and sprout depending on the careful nurturing you provide.
The stage of planting in potting soil has already begun the growth phase. Remember to opt for a well-draining soil mixture. Ensuring good drainage is key to avoid water clogs which can cause root rot – a known enemy in the realm of gardening. A good mixture could comprise of sphagnum peat moss, vermiculite, or perlite.
Your journey doesn’t stop at merely planting the seed. Proper sunlight exposure is one of the most significant aspects of this process. Plum seeds favor the comfortable warmth of the sun as it induces optimal germination. An area that gets at least 6 to 8 hours of sunlight daily is ideal. While being sun-loving, remember these hopeful saplings also need adequate protection from harsh mid-day sun rays. Positioning your pot at an east-facing window could work in your favor.
As with watering, maintaining the right humidity level for your growing seed is paramount. A little extra moisture in the air can aid in the germination process, enhancing your tree’s growth. Try spritzing the area around the plant with a spray bottle for better moisture regulation.
The importance of correct fertilization mustn’t be overlooked either. A balanced, slow-release fertilizer containing Nitrogen, Potassium, and Phosphorus is your best choice. As growth begins, consider adding some organic compost. But remember, less is more at this stage. Over-fertilization can be harmful!
One of the unique joys of growing your own plum tree is monitoring the progress. Repotting is a necessary step as our ardent sapling demands more space for its roots. Once the seedling starts developing its second set of leaves, consider moving it to a larger pot. Repotting provides the essential legroom for your sapling’s roots to expand, ensuring a sturdy, healthy plum tree.
Pruning is another essential key to a bountiful tree. By selectively cutting back limbs and shoots, you thereby control the tree’s shape and size while directing energy towards fruit production. This can also promisingly impact the quantity and quality of your future plum harvest.
All these steps can truly weave the tale for your plum tree’s healthy journey from a tiny seed to a robust tree. While these guidelines are sturdy, do remember that each seed has its unique quirks and individual needs. Be observant, flexible, and responsive to the seed’s needs. Ensure you keep learning and enjoying. Happy gardening!
Maintaining and Caring for the Plum Tree
Alright then, let’s delve deep into the riveting world of plum tree maintenance, shall we? At this point, you have just started seeing the fruit of your labor and voila! Your sapling is growing. But caring for a plum tree, like any tree, is a continuous journey. The thrill of nurturing a seed to a sapling is then succeeded by the sheer joy of seeing it mature into a thriving tree. And, much like our journey so far, this is a process that needs love, attention, and a sprinkling of know-how.
First up, location is key. Plum trees love sunlight and need around 6 hours of it daily. Yet they don’t appreciate harsh hot rays, so find a spot that sees gentle morning rays, followed by diffused light throughout the day. If you’ve planted your tree in a pot, rotate it every few days to ensure all sides receive equal light.
Ensure that what you’ve been watering isn’t just sitting and sullying the roots. A well-draining soil mix combined with a pot with proper drainage holes works wonders. Having water stand in the roots could lead to root rot, an enemy of our plum tree.
Envisage your plum tree basking in the gentle sunlight, with soft soil under its roots, and then imagine… A touch of humidity in the air! Oh yes, plum trees love their humidity levels hovering around 50%. You could mimic this by gently misting your plants with water and grouping other plants around.
Now, let’s talk about another gem in the plum tree caretaker’s arsenal—fertilizer. Not just any fertilizer, but a balanced, slow-release variant specifically designed for fruit trees. Follow the instructions on your chosen product and apply in early spring to give your plum a nutritional boost.
Re-potting some plants is often seen as an inconvenience but not with plum trees. It is in fact vital for healthy root growth. Typically, when the tree outgrows its pot, it gets a bit rootbound. That’s your cue to replant the tree in a larger container. With more space to grow, its roots will fan out, and your plum tree will flourish.
Last but not least, let’s not forget pruning. Oftentimes, people get nervous about taking scissors to their beloved tree. But trust me, it’s for the best. Pruning helps control the tree’s shape, promotes better air circulation, and encourages more robust fruit production. The best time to prune is late winter when the tree is still dormant—simply snip off any dead or diseased branches to allow the rest of the tree to thrive.
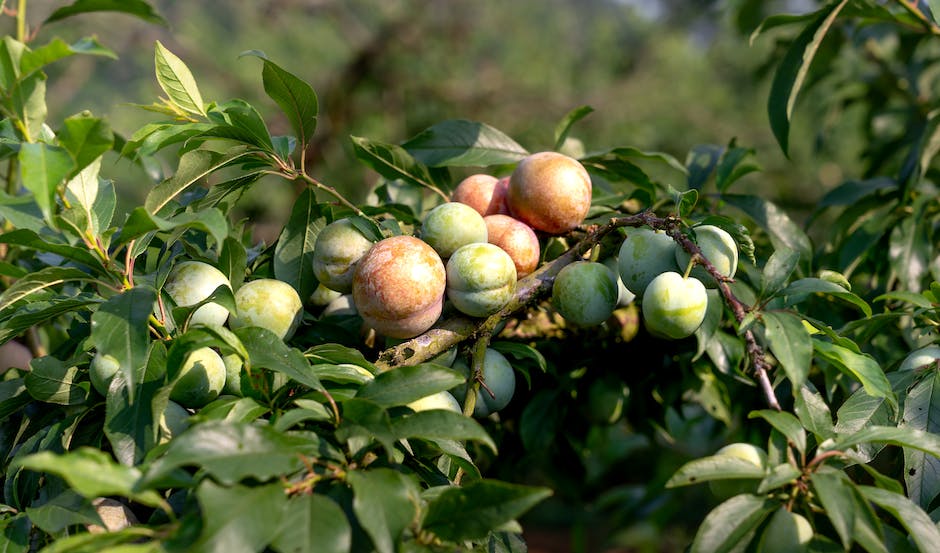
With these guideposts, the journey of plum tree care becomes clearer, and before you know it, you’ll be an expert, growing beautiful and bountiful plum trees. And the sight of those vibrant, juicy fruits hanging from your own tree? Absolutely unforgettable! There’s nothing quite like the joy that springs from a hobby fully embraced and expertly executed. So here’s to nourishing your green thumb, and in the process, reaping the rewards of deliciously sweet and juicy plums from your very own trees!

As your tree grows and starts bearing fruit, the process of nurturing it from a small seed into a mature tree can be very rewarding. Through the right balance of patience, care, and adherence to proven practices as covered in this guide, you are well on your way to succeeding in your gardening adventure. Growing a plum tree from seed is not just about enjoying delicious and healthy fruit, it’s also about the satisfaction of nurturing life, watching it thrive under your care. It’s a tangible testament to your diligent work, the beauty and abundance that patience and care can bring forth. Remember, the journey of growing a tree is just as significant as the sweet fruit it bears.


